Resurrecting a Delta 3D Printer
If you give a Jim a Kossel...
“You can have it…”
“Do whatever you want with it, as long as you don’t bring it back."
This adventure began as a transaction with atypical terms. Not only did they generously favor me, but they were exceedingly clear and amicable for both parties.
Now, like many things that don’t cost you any money, this thing has been expensive in other challenging and satisfying ways.
I recently caught up with an old coworker via video chat for the first time in months. I shared my wish to finally get a 3D printer, as well as my hesitance to do so. I figured I’d use a drill press or a belt+disc sander before I ever made good use of a 3D printer. Well, his solution was to send all 3 my way, as he had bigger and better versions of each. Talk about a lucky break!
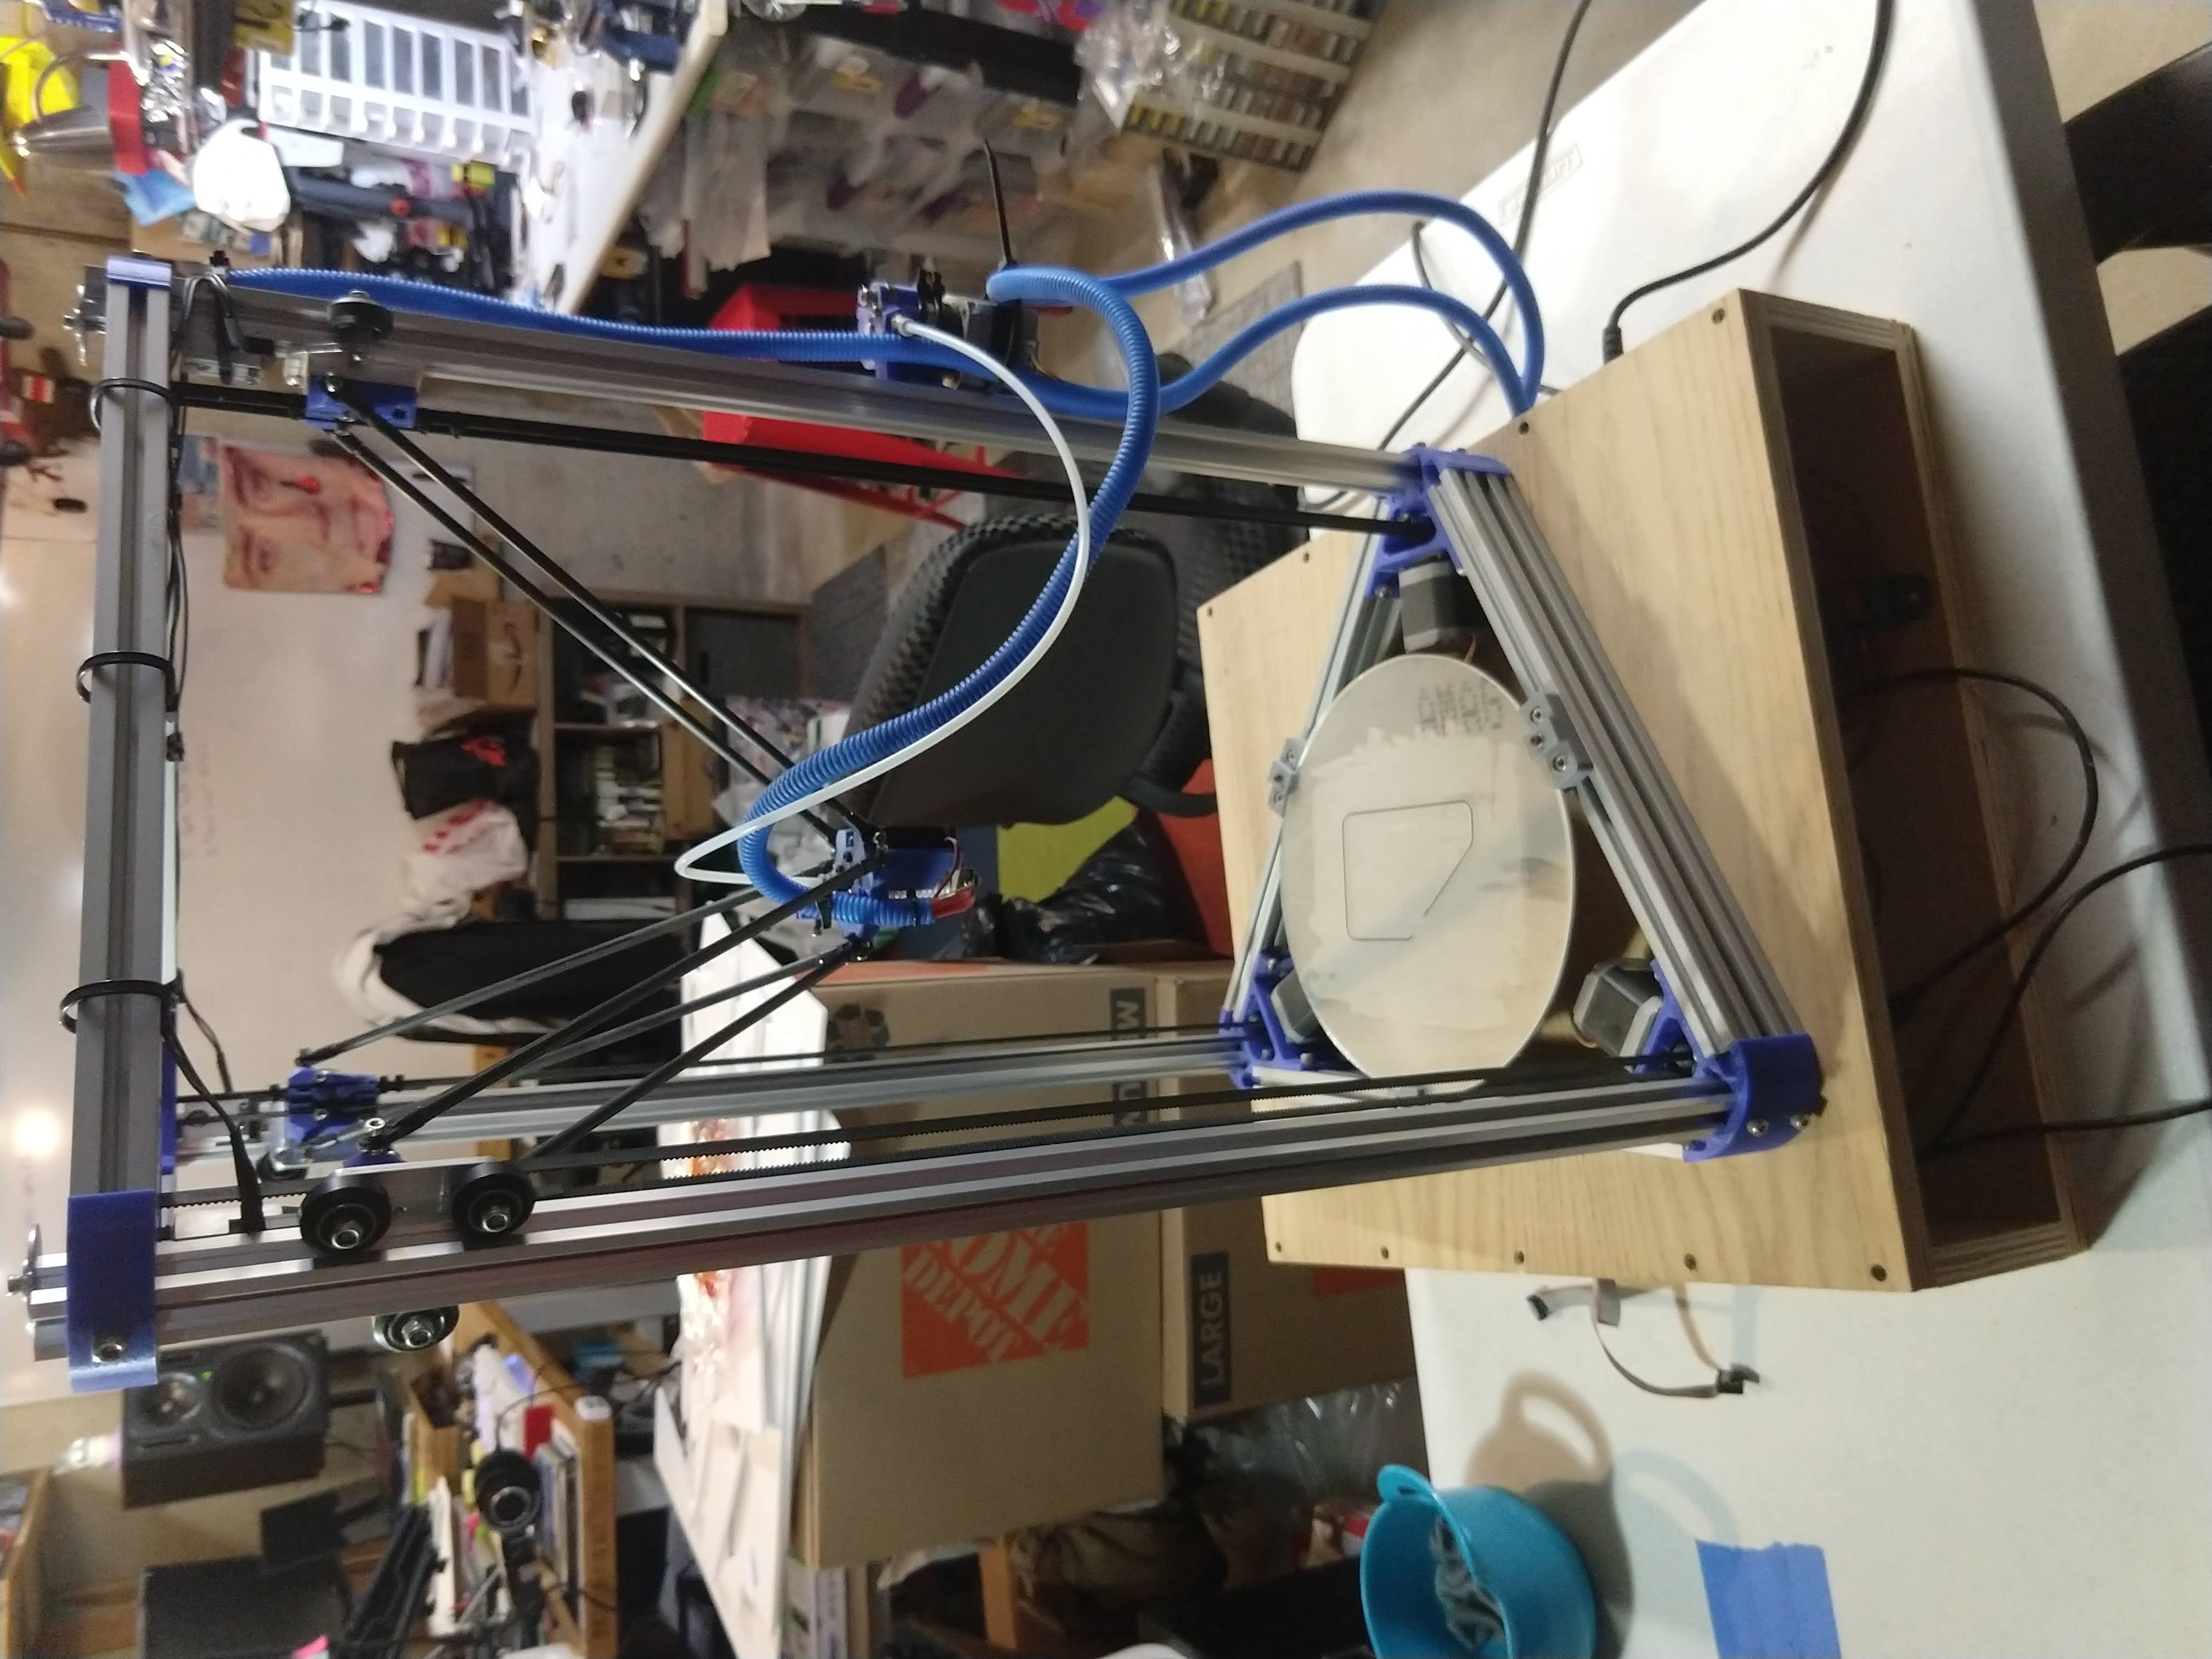
He had a kit-built Kossel 250 from 5+ years ago. He bought a bunch of upgrades for it that still required installation. The RAMPS 1.4 board went haywire a few years ago, so the heating bed stopped turning off. Since the time he built it, 3D printers have become much more inexpensive. Furthermore, “bonus features” from the past, like heated beds and automatic bed leveling, are now basic functionality for many new printers.
Start small
The first thing I did after cleanup was take inventory of the parts, and make a rough plan of attack. Along the way, I collected a glossary of terms, as well as any helpful documentation. I knew this printer was left in a usable state, so I decided to start with that as my baseline.
The previous owner purchased a new control board, and many other upgrades. These were tempting. But again, I opted to wait - at least until I familiarized myself with the machine in its current, simpler state.
Make a plan
Like anything sufficiently complex and interesting, it’s critical to identify a smaller near-term goal. I found plenty of interesting things to chase during my initial research. It took frequent, sometimes audible reminders to myself to stay focused. It’s so easy to fall into a false sense of productivity from premature or excessive research.
Here’s where I landed:
- Install and configure Arduino Studio to recognize and control the RAMPS 1.4 board.
- Learn just enough about Marlin Firmware for delta 3D printers to create a new configuration for this machine.
- Print a basic calibration or test object.
- Decide what to do next.
Stick to the plan
…with relatively few diversions (for me anyway).
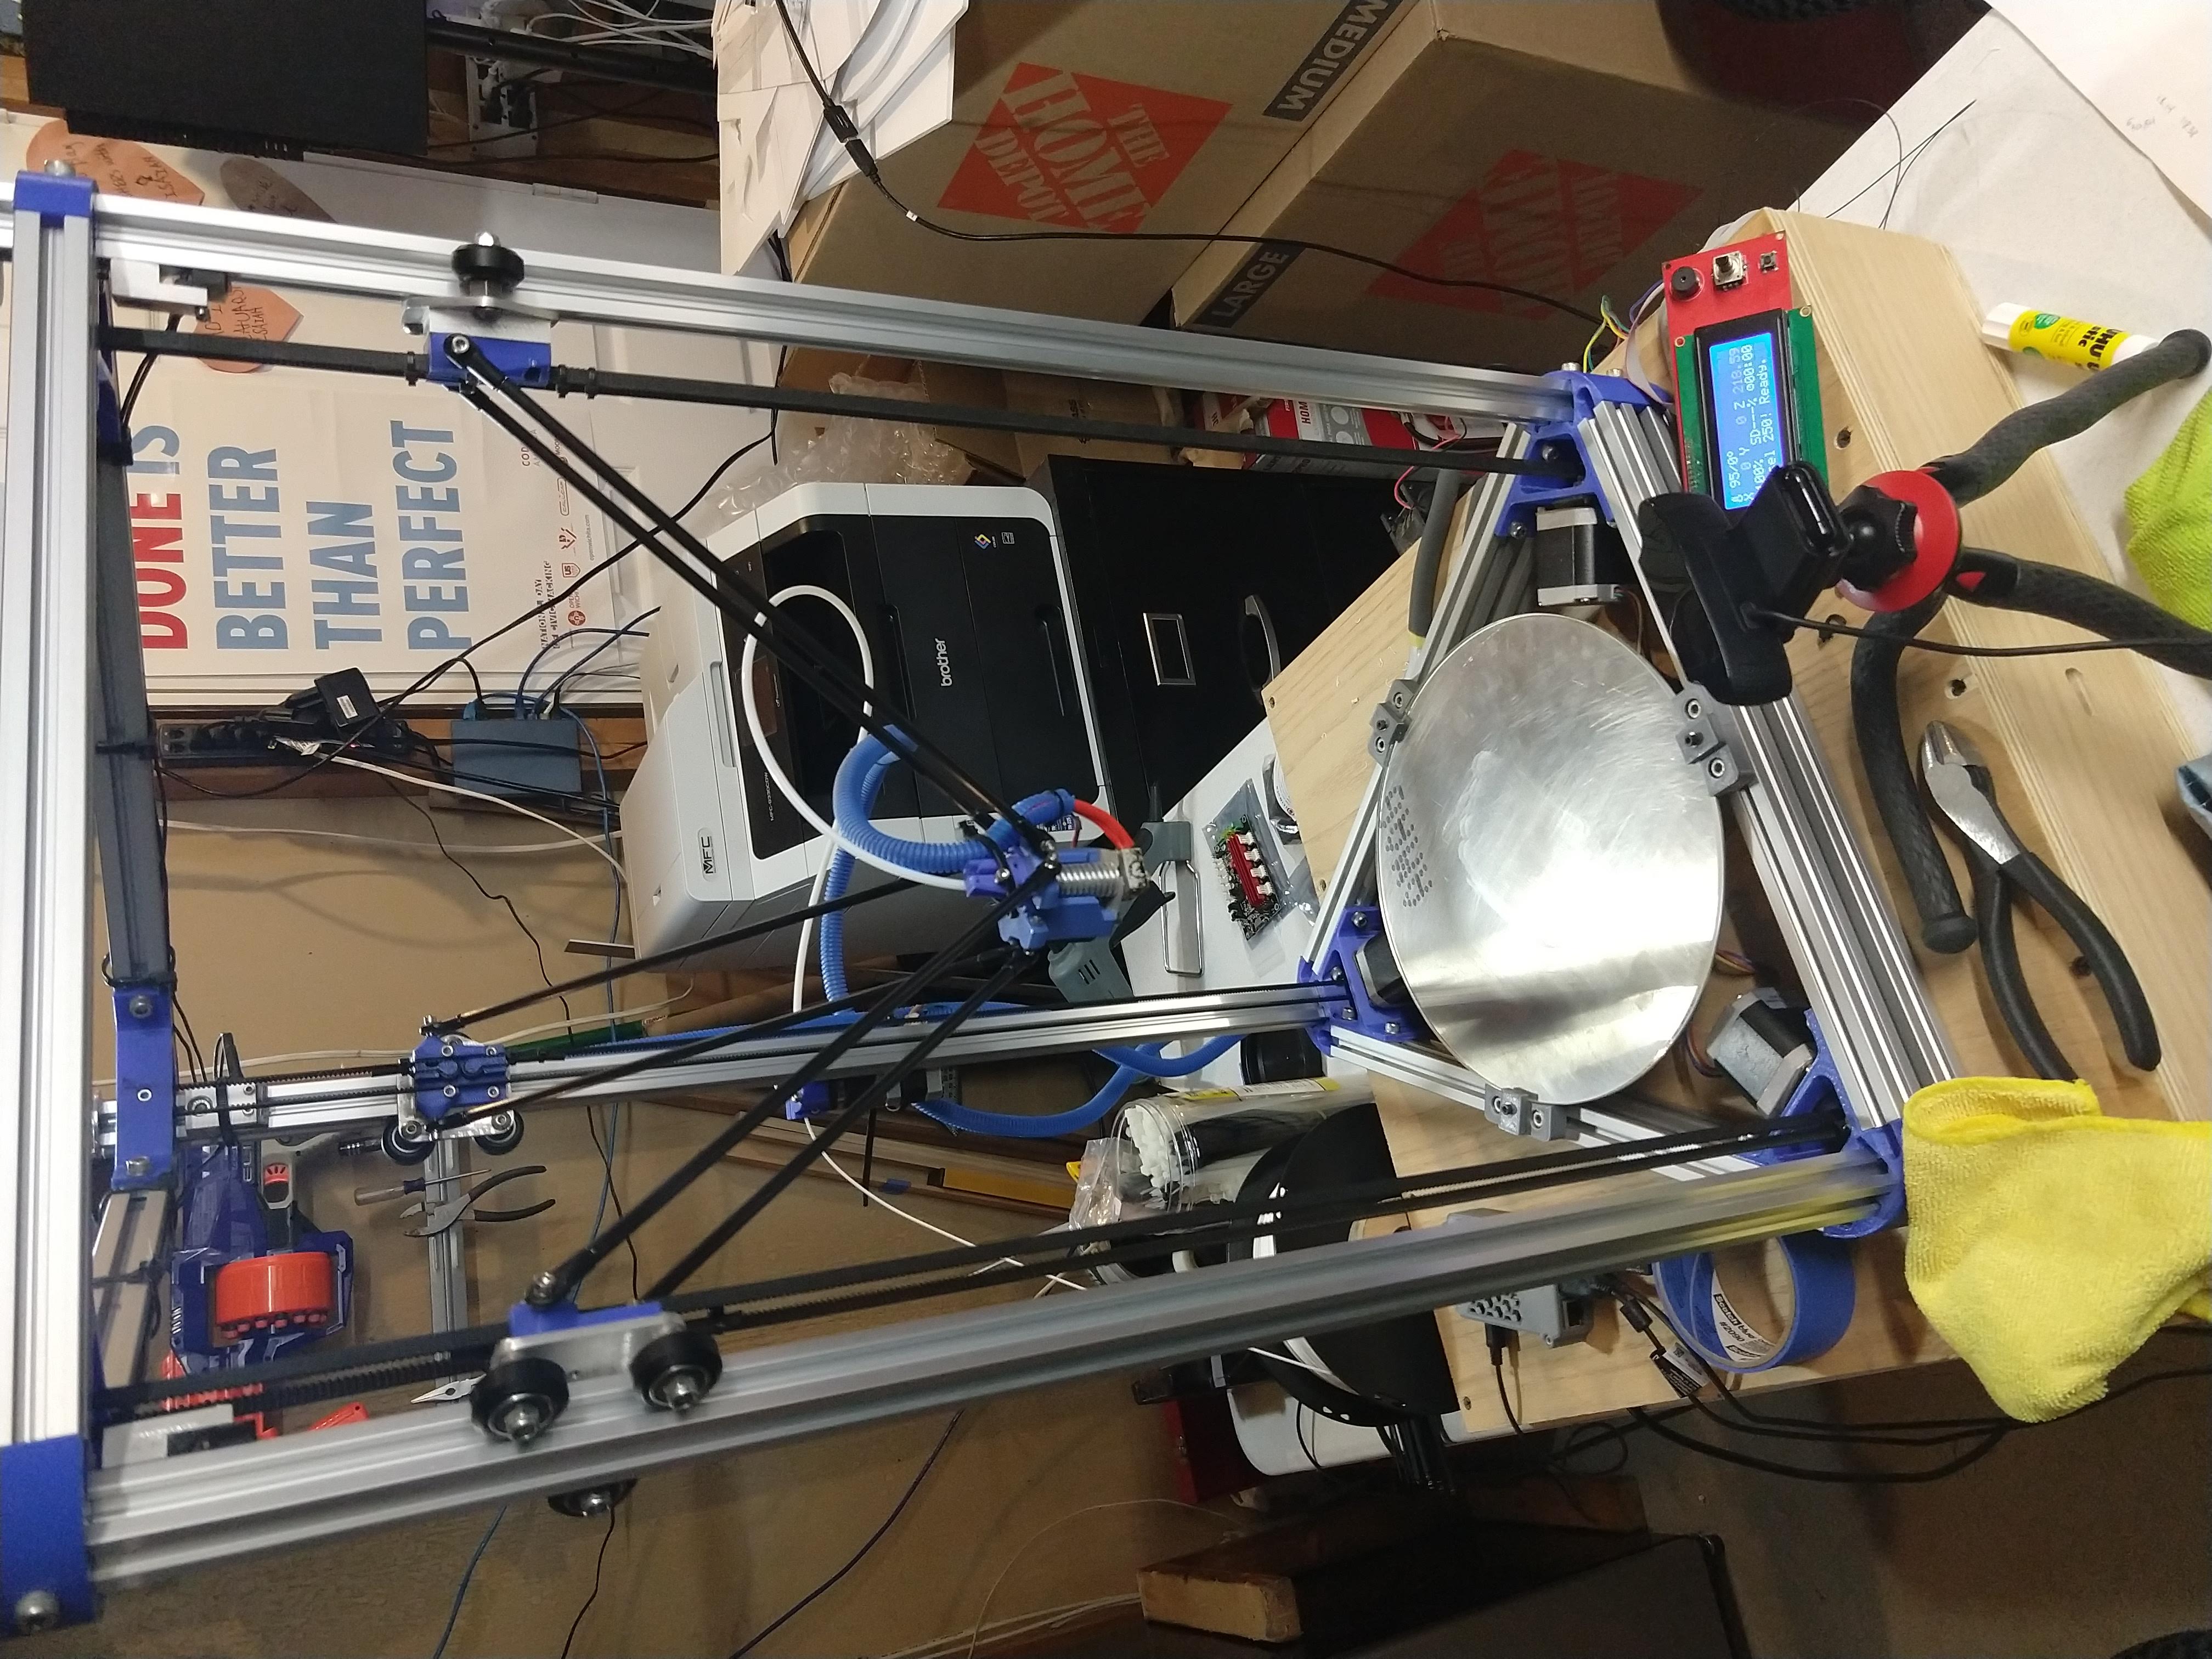
- Installed OctoPi on the supplied Raspberry Pi 2 for a friendlier interface and remote monitoring via webcam on my local network. This seems like extra, but it was relatively simple to set up, and made the project that much more exciting.
- NOTE: on my laptop, the recommended “Etcher” utility repeatedly caused BSOD when attempting to flash the SD card with OctoPi. I had better luck with the Raspberry Pi Imager.
- I needed to dig quite a bit to learn and configure the basic details and dimensions that are important for a delta 3D printer.
- This was helped by some Marlin commands for reading the current configuration. This wasn’t an exhaustive list, but saved me some steps and measurements.
- There’s a fair amount of info on delta printers across YouTube, RepRap forums, and elsewhere. However, most examples use much older versions of Marlin with poorly-documented deprecations. Or they’re for delta kits just similar enough to my printer to be misleading.
The results
Print, change, repeat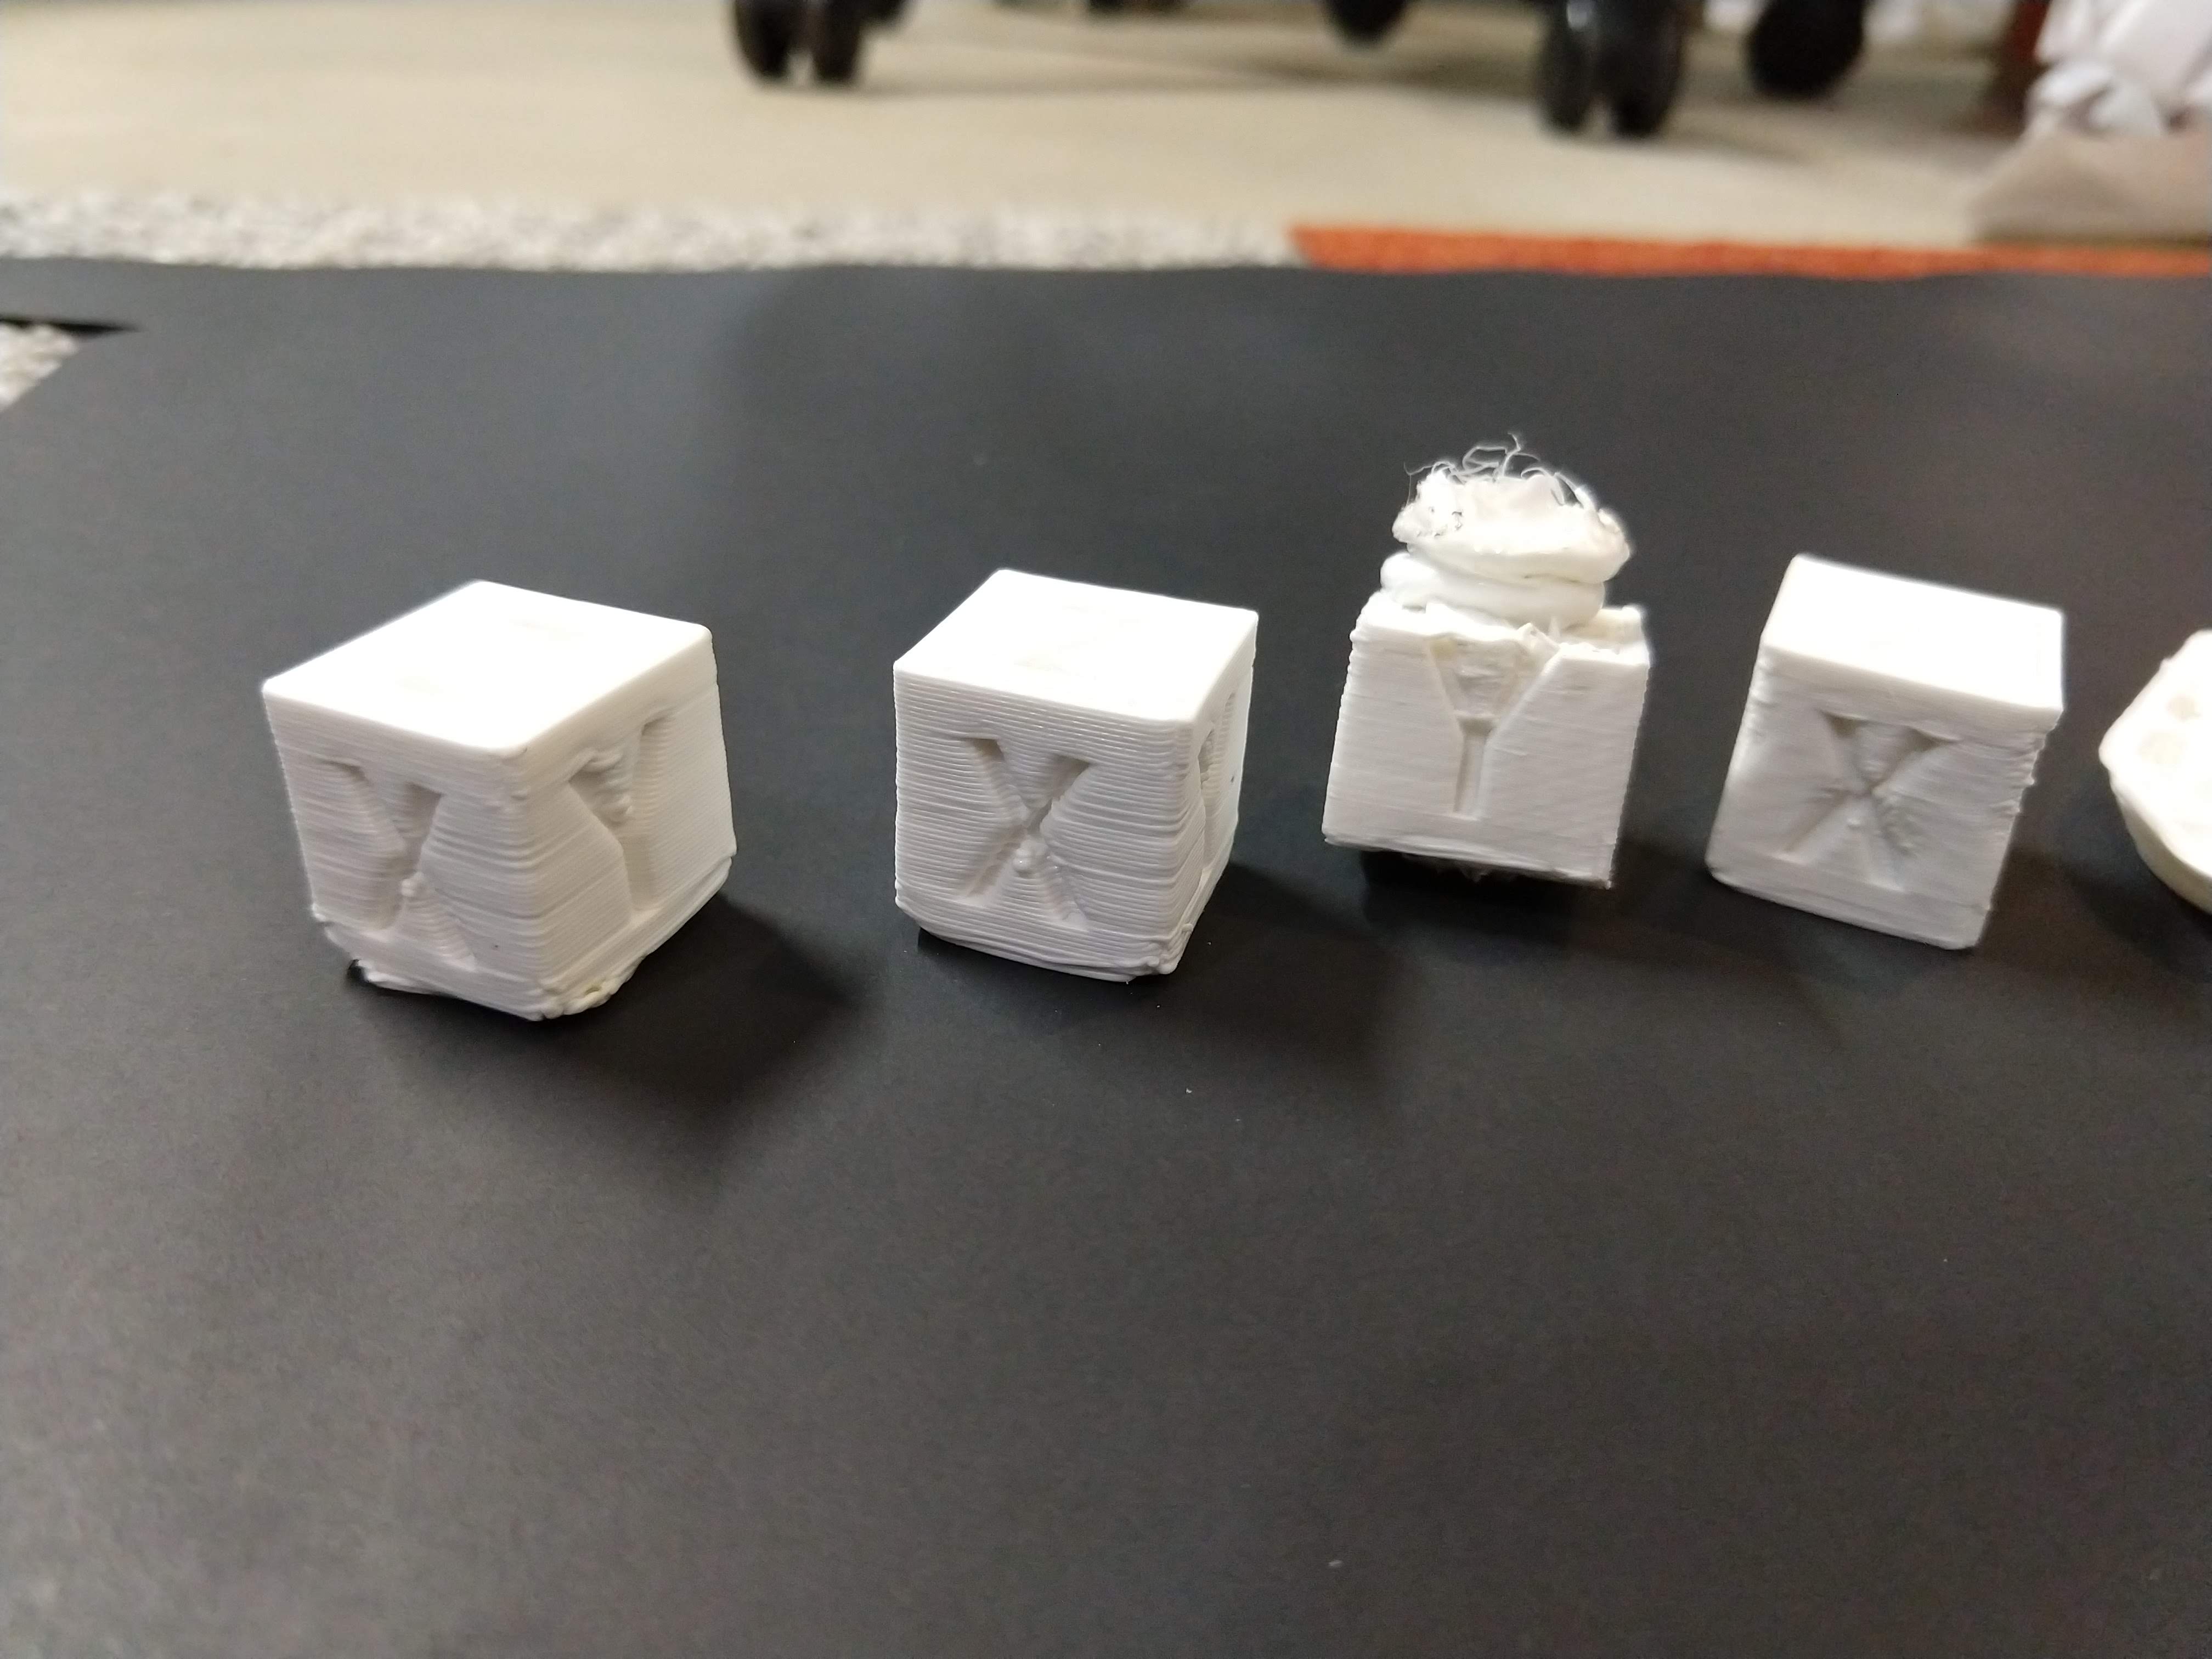
I managed to get a few prints of this calibration cube to complete. But the first layer was shifted quite a bit, and bed adhesion suffered. On the 4th cube from the left, I felt I’d achieved “close enough” manual bed calibration and GCODE settings to give the classic benchmark/torture test 3DBenchy a try.
After this attempt I learned about the order of operation at play, and how settings in your model’s GCODE override your printer’s default configuration. I followed the recommended layer height etc for the calibration cube and 3DBenchy, to much better results.
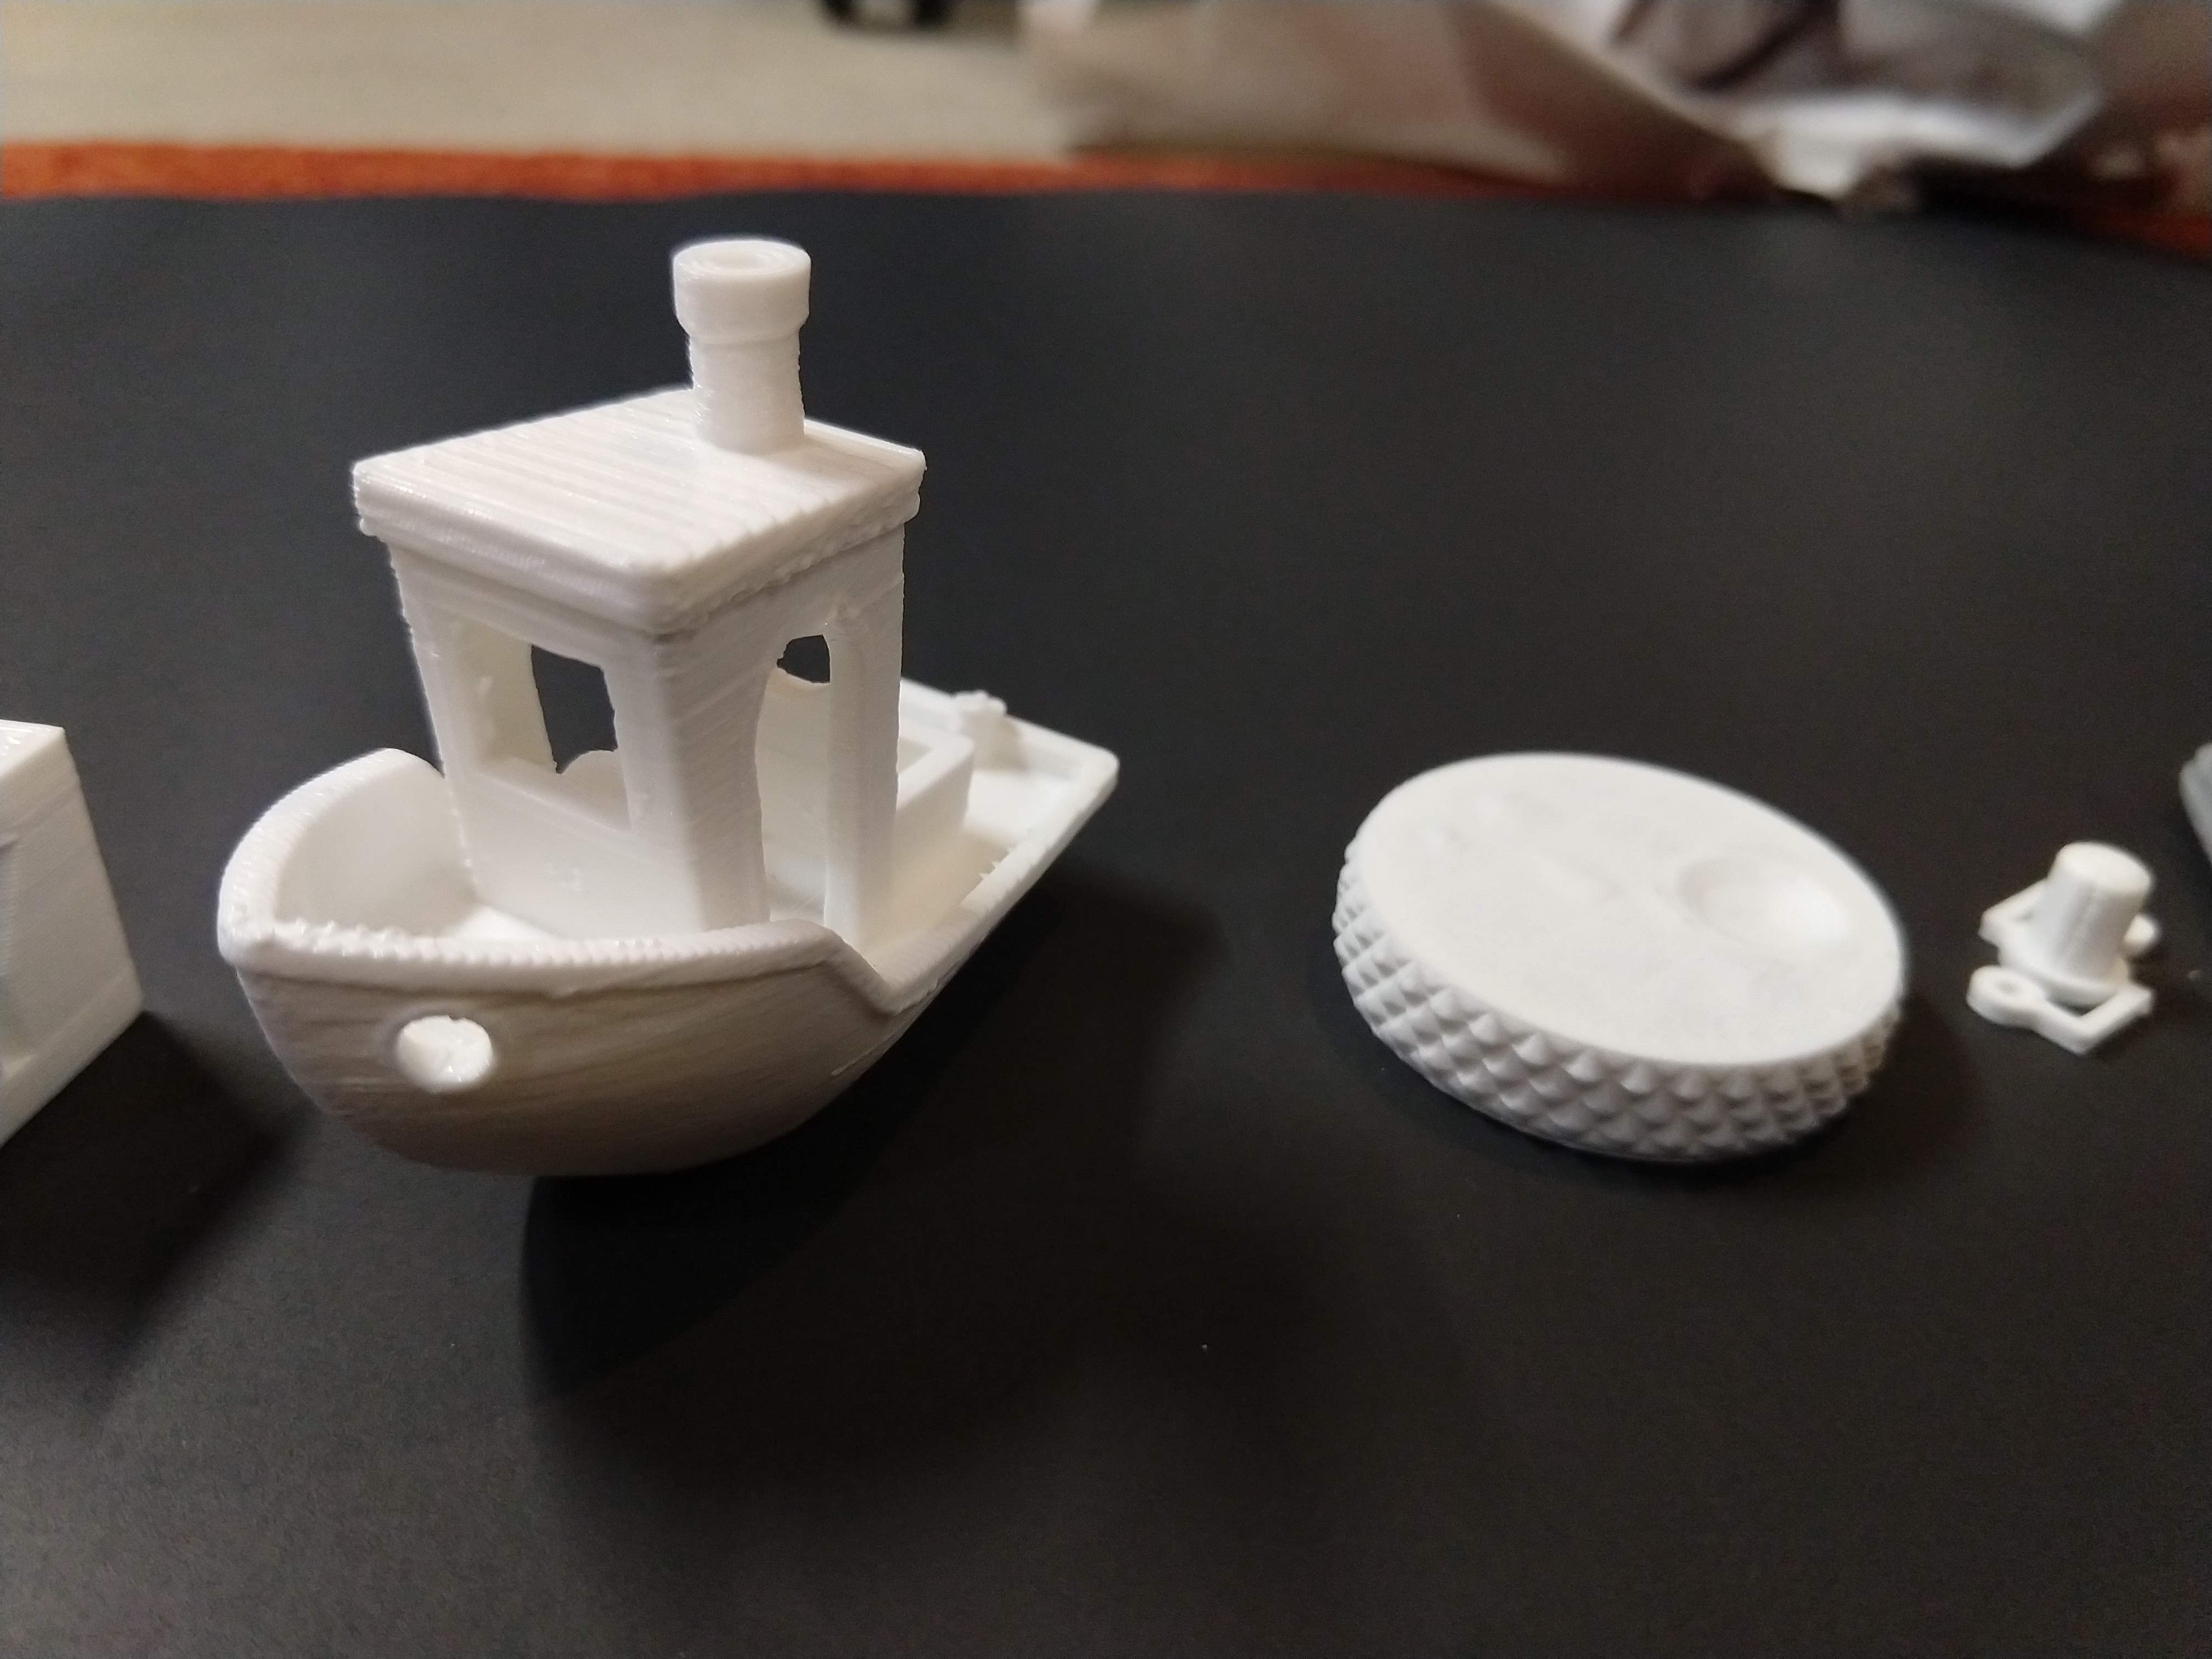
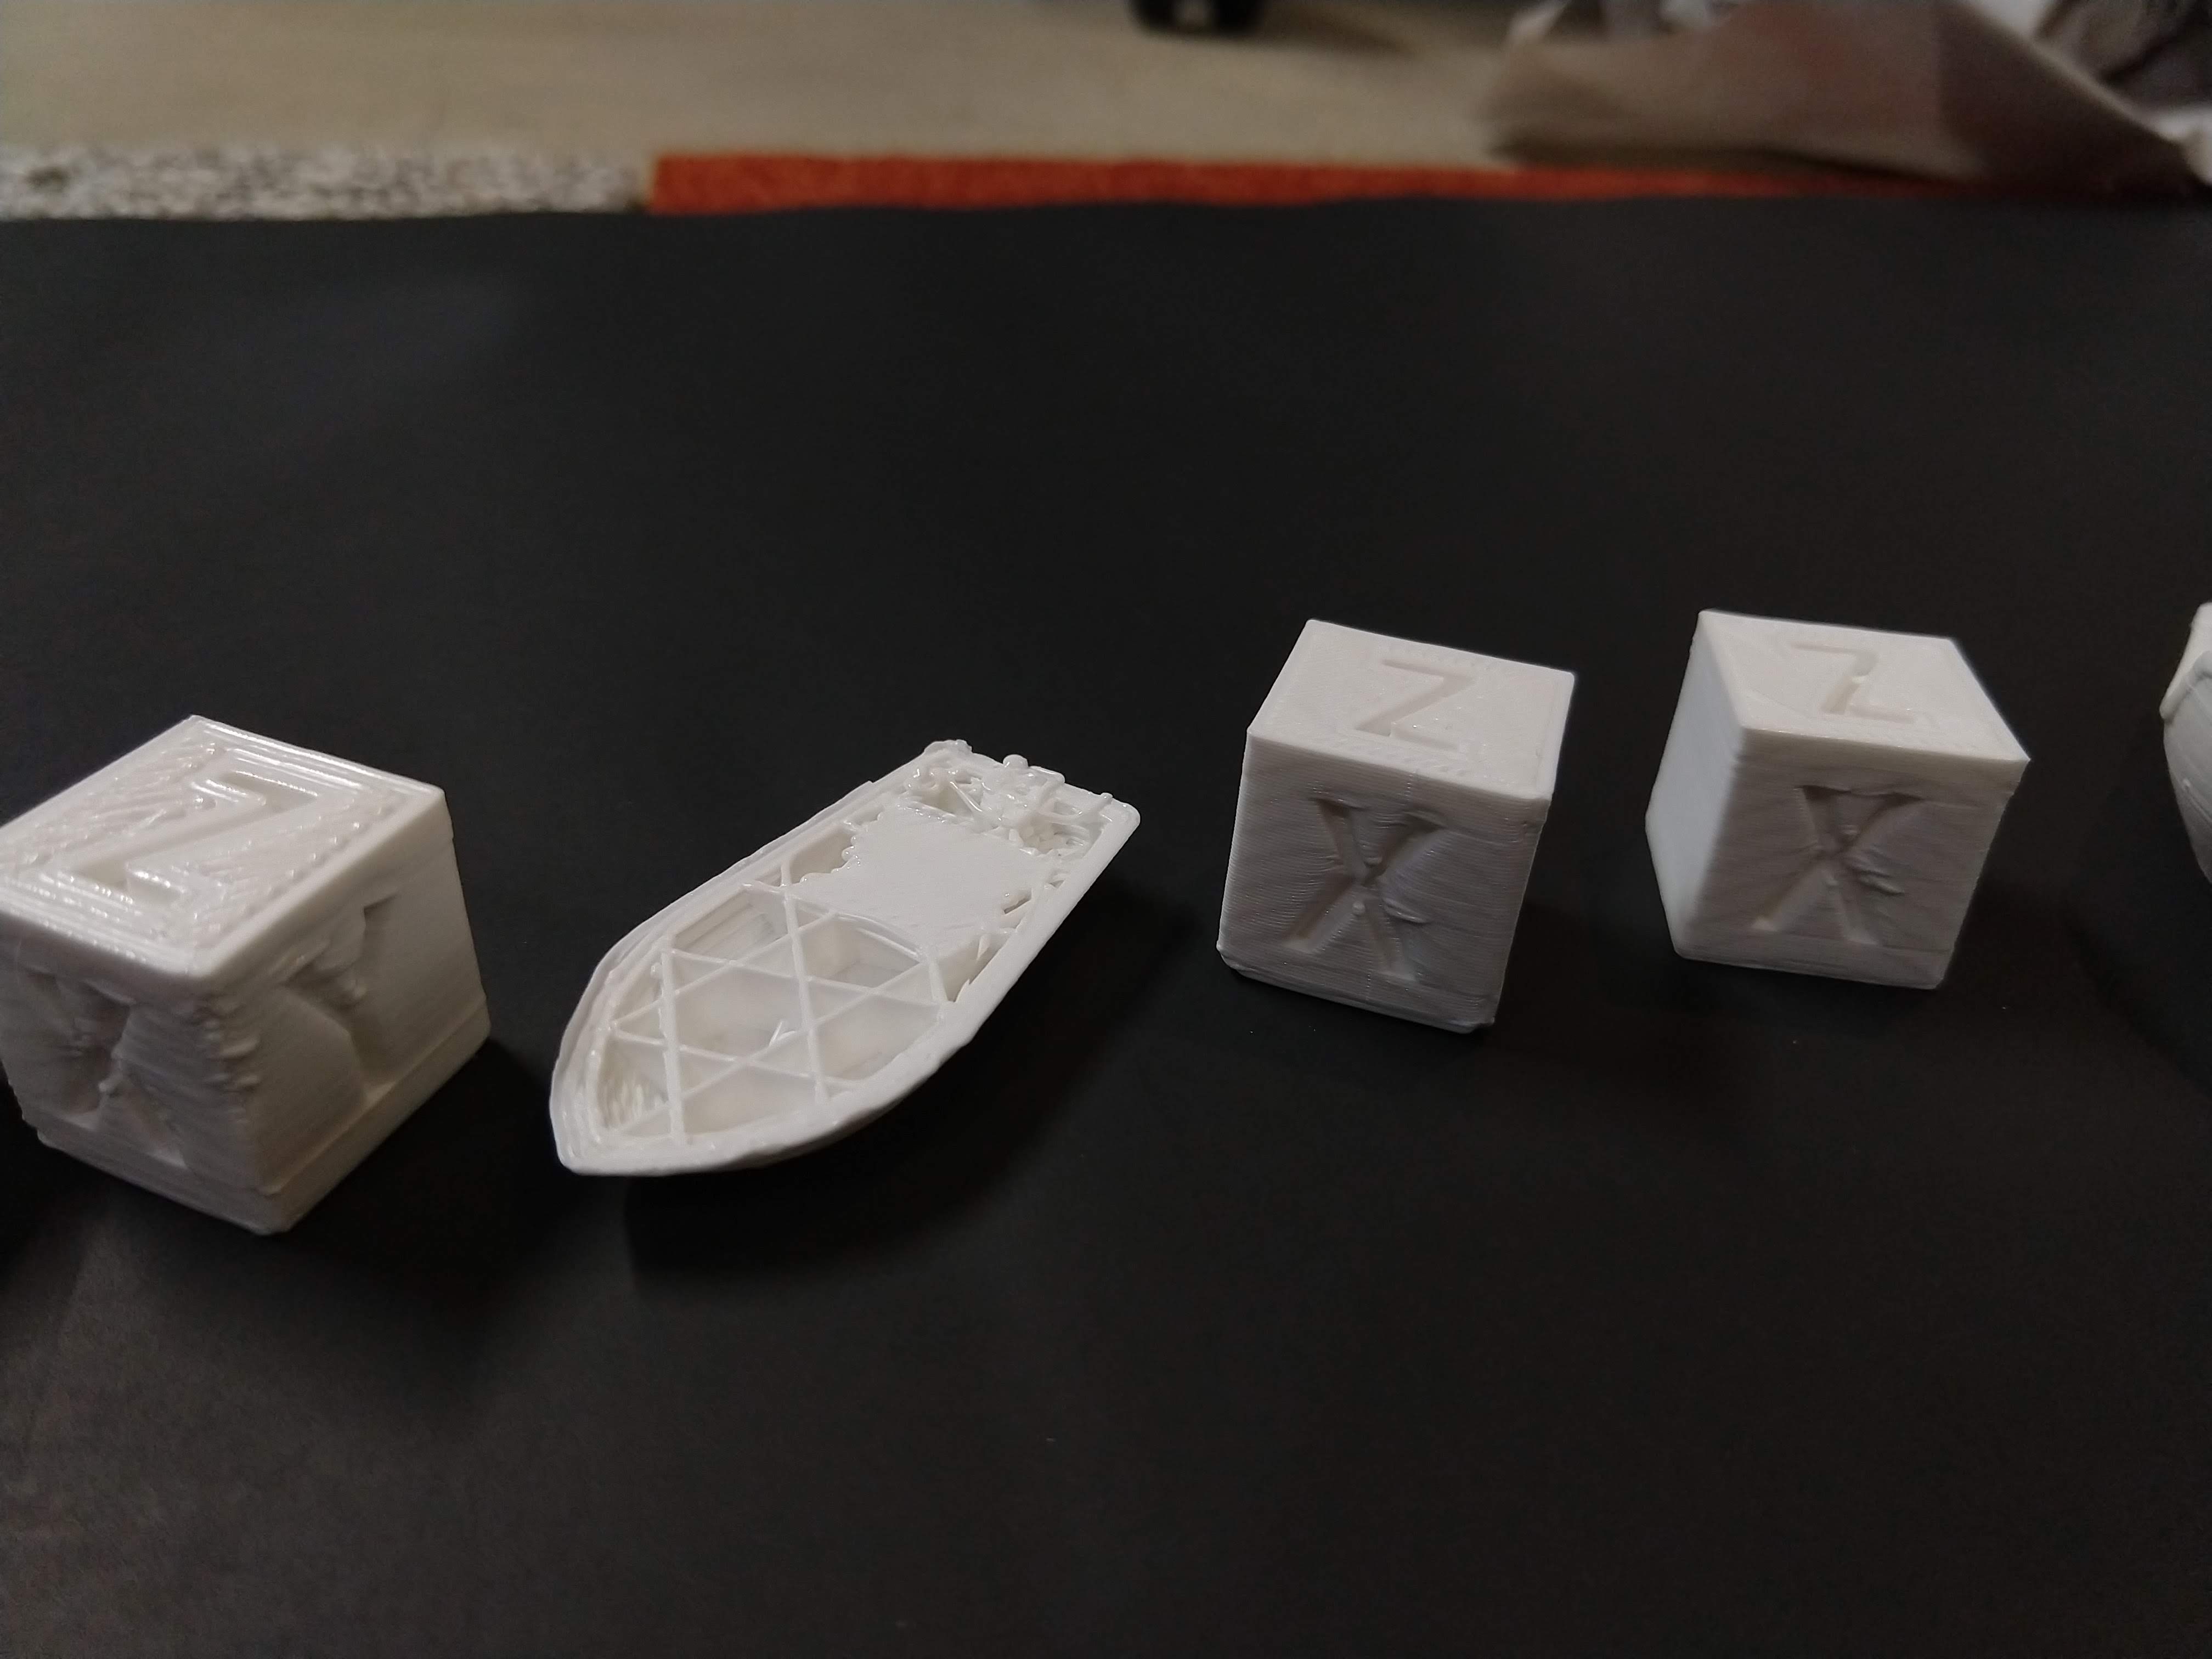
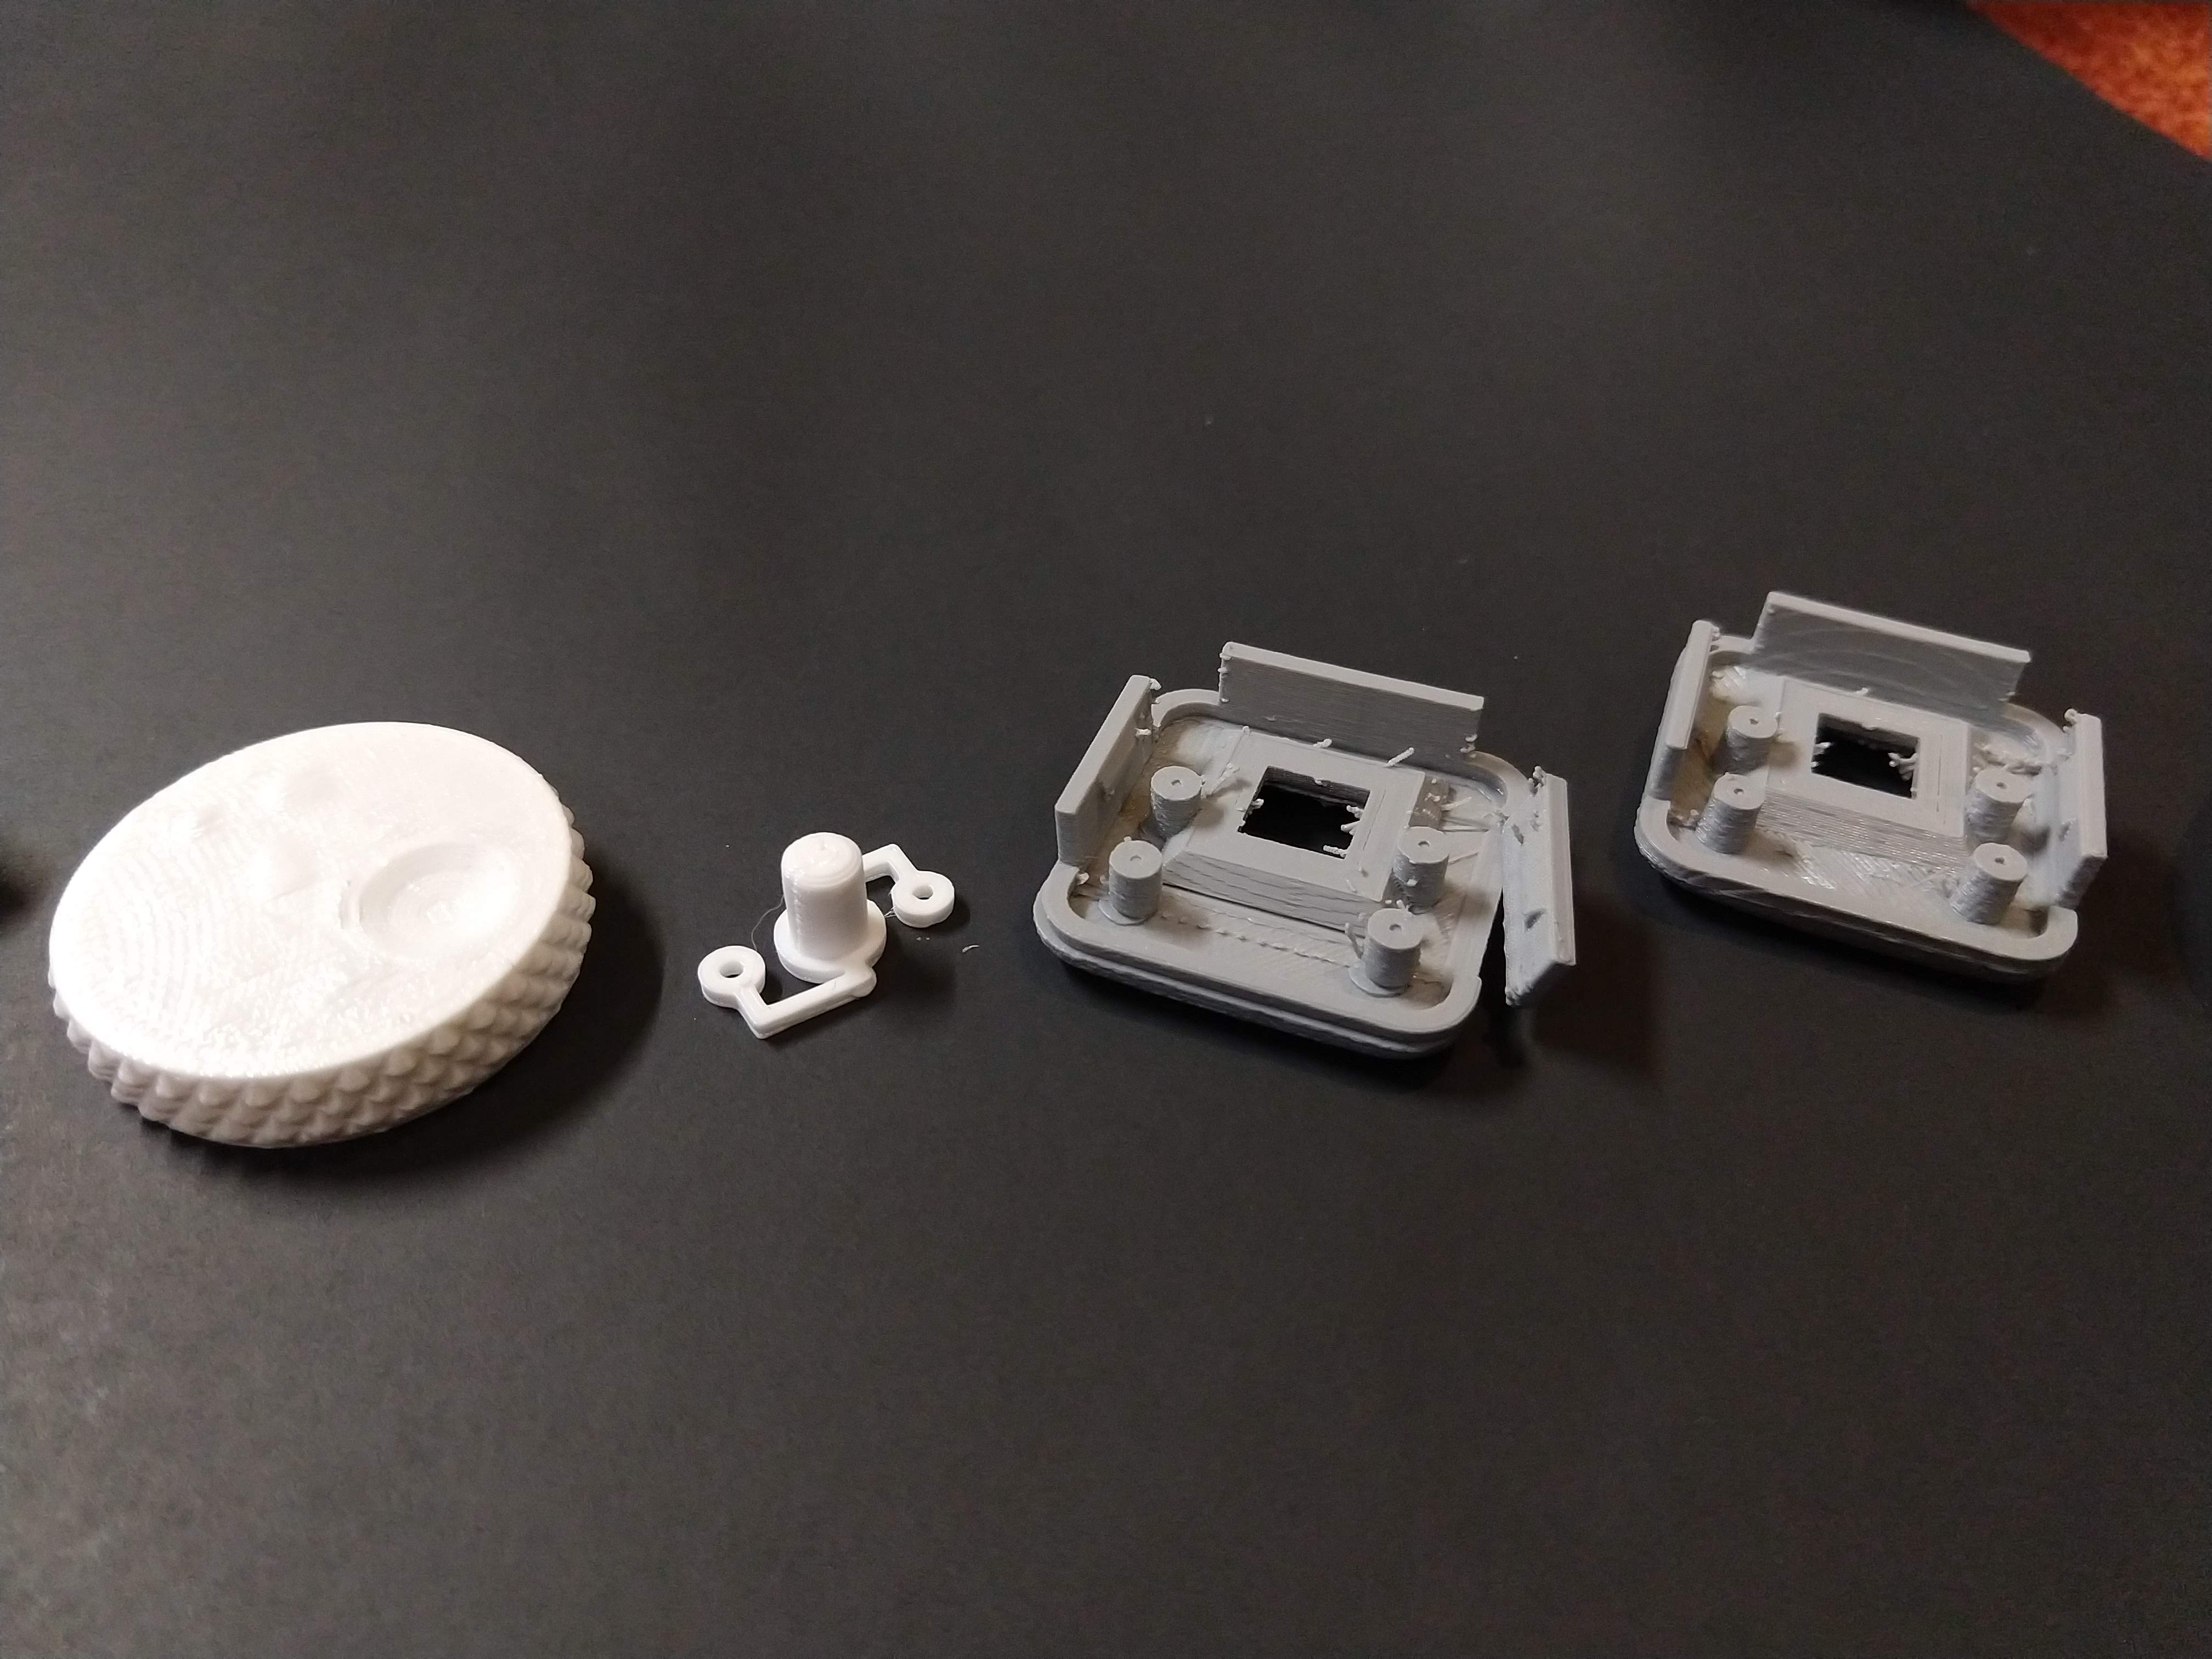
The Benchy had a few issues, but I felt confident enough that now I could try a few functional prints. The sides of the knurled knob for my printer’s RepRapDiscount Smart Controller turned out pretty well. The top layer wasn’t great, but it was serviceable.
Then I printed the button from this enclosure - seen above.
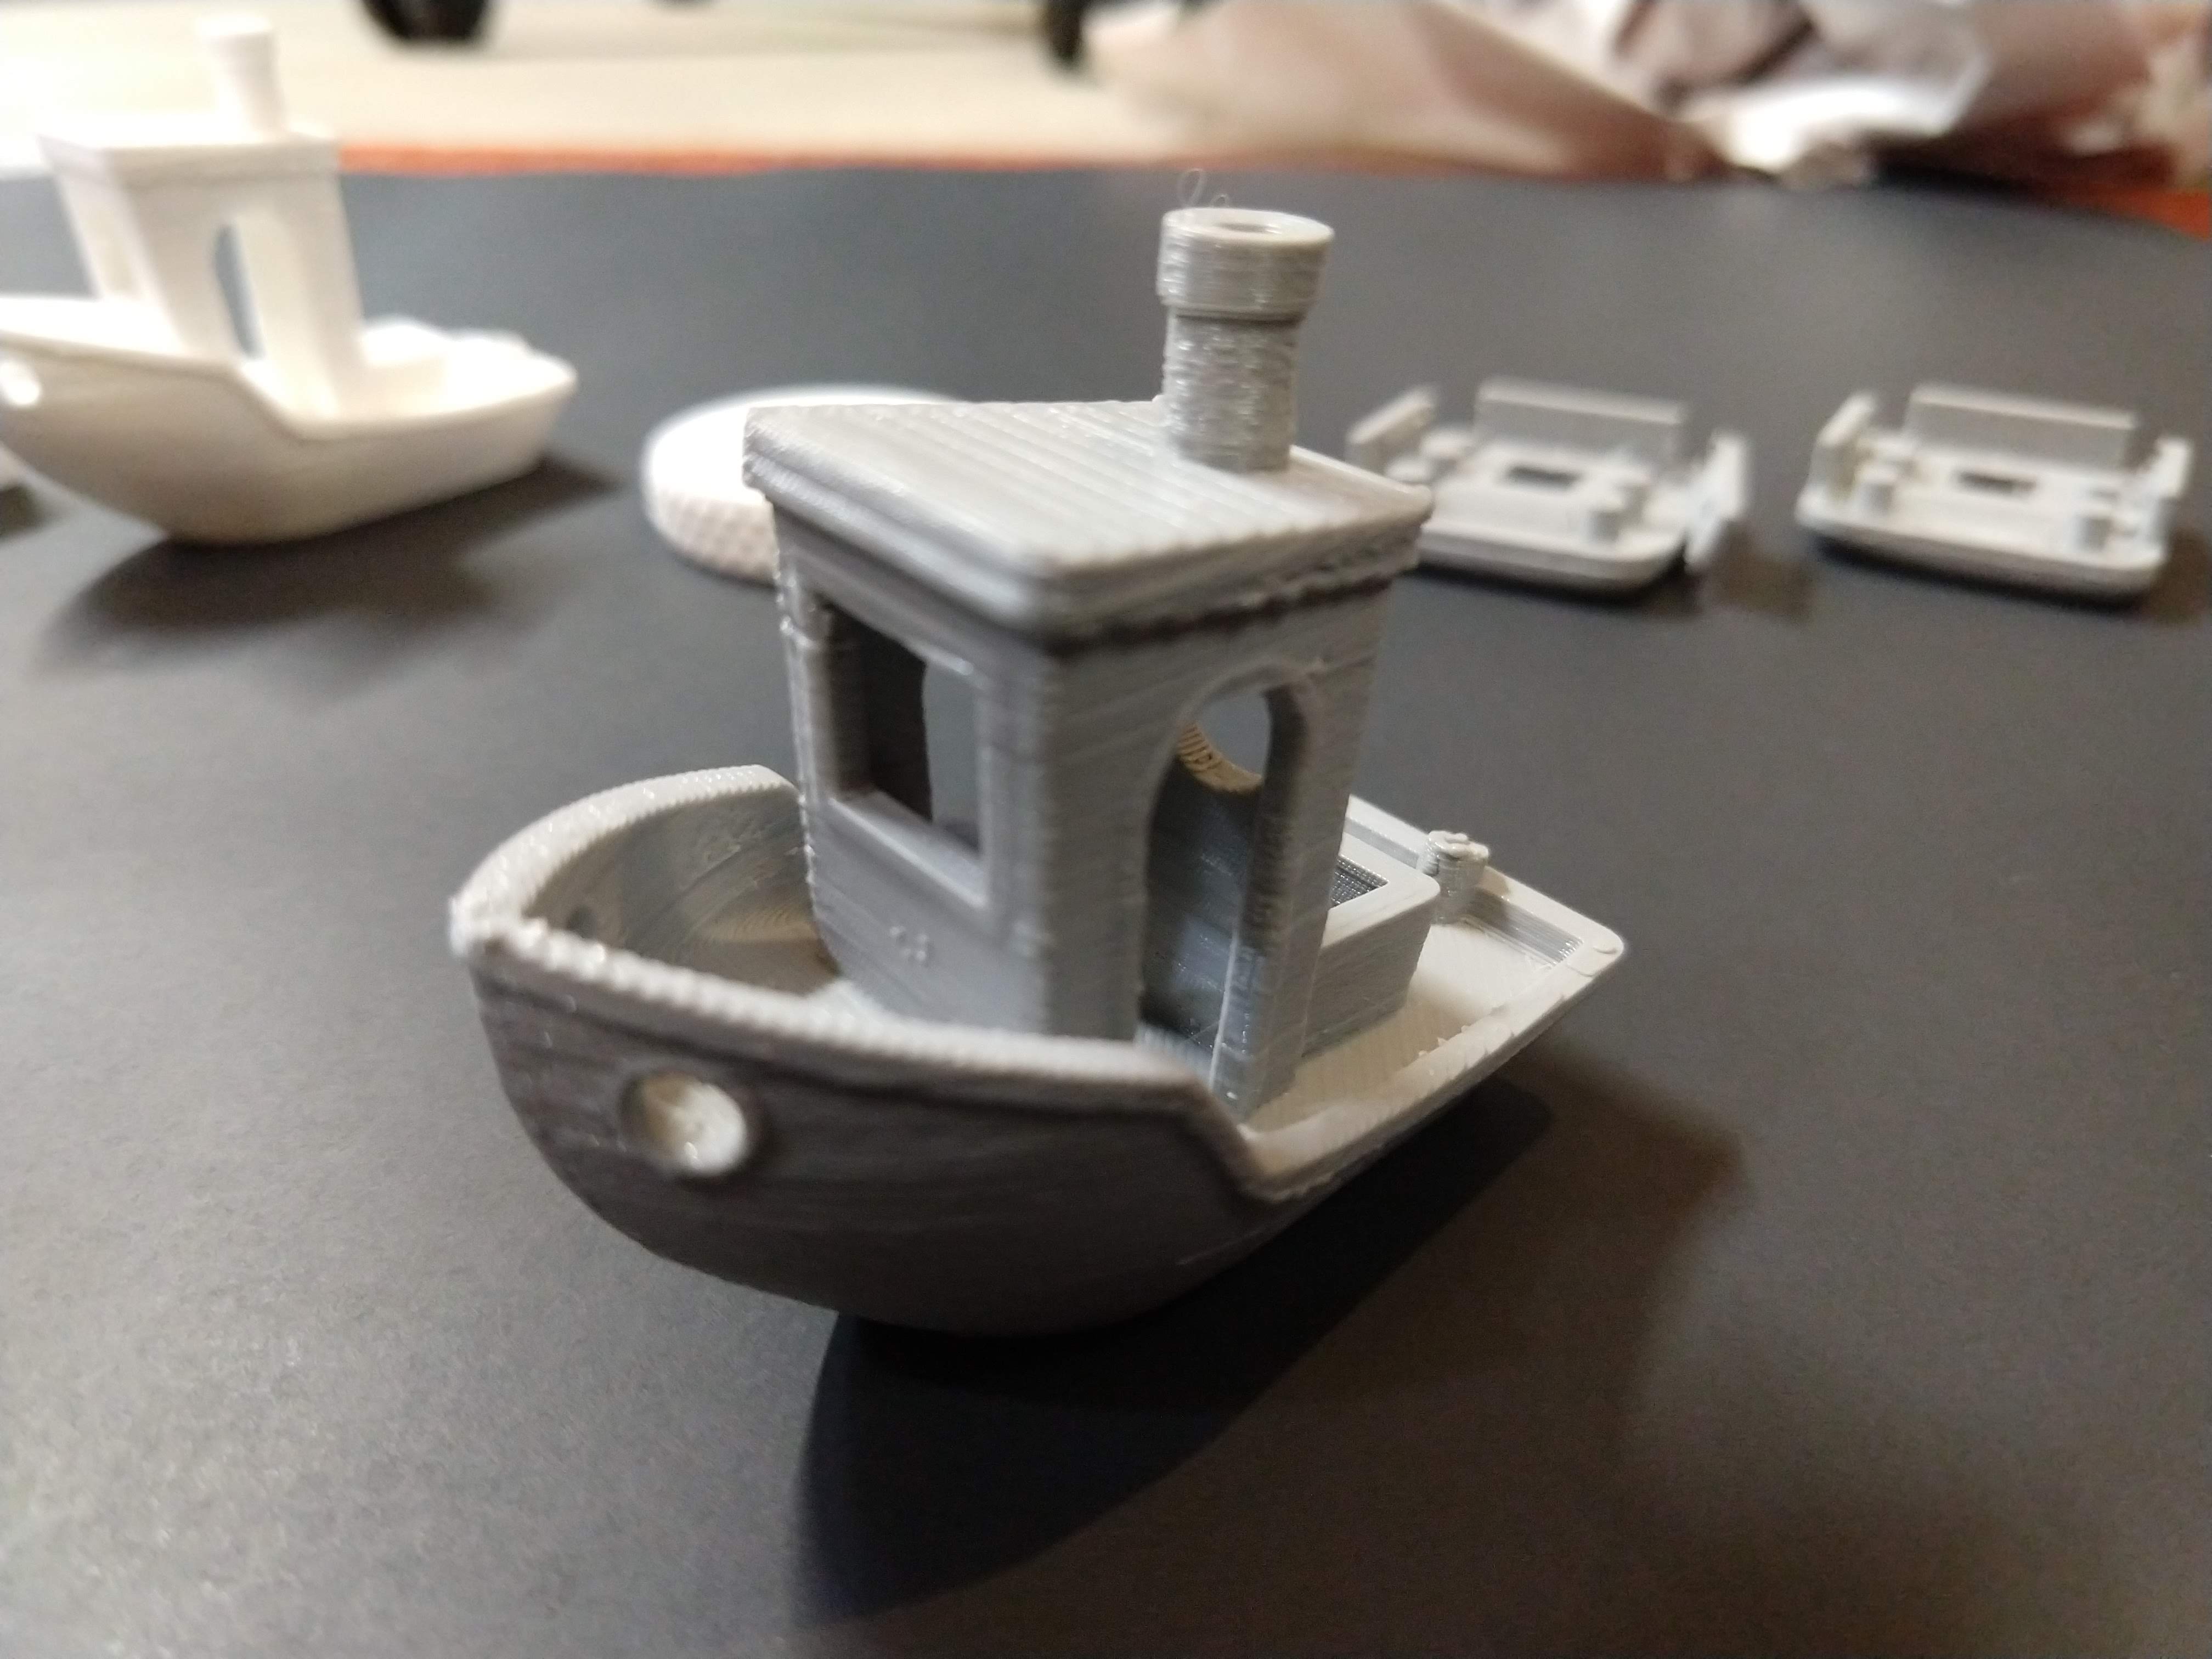
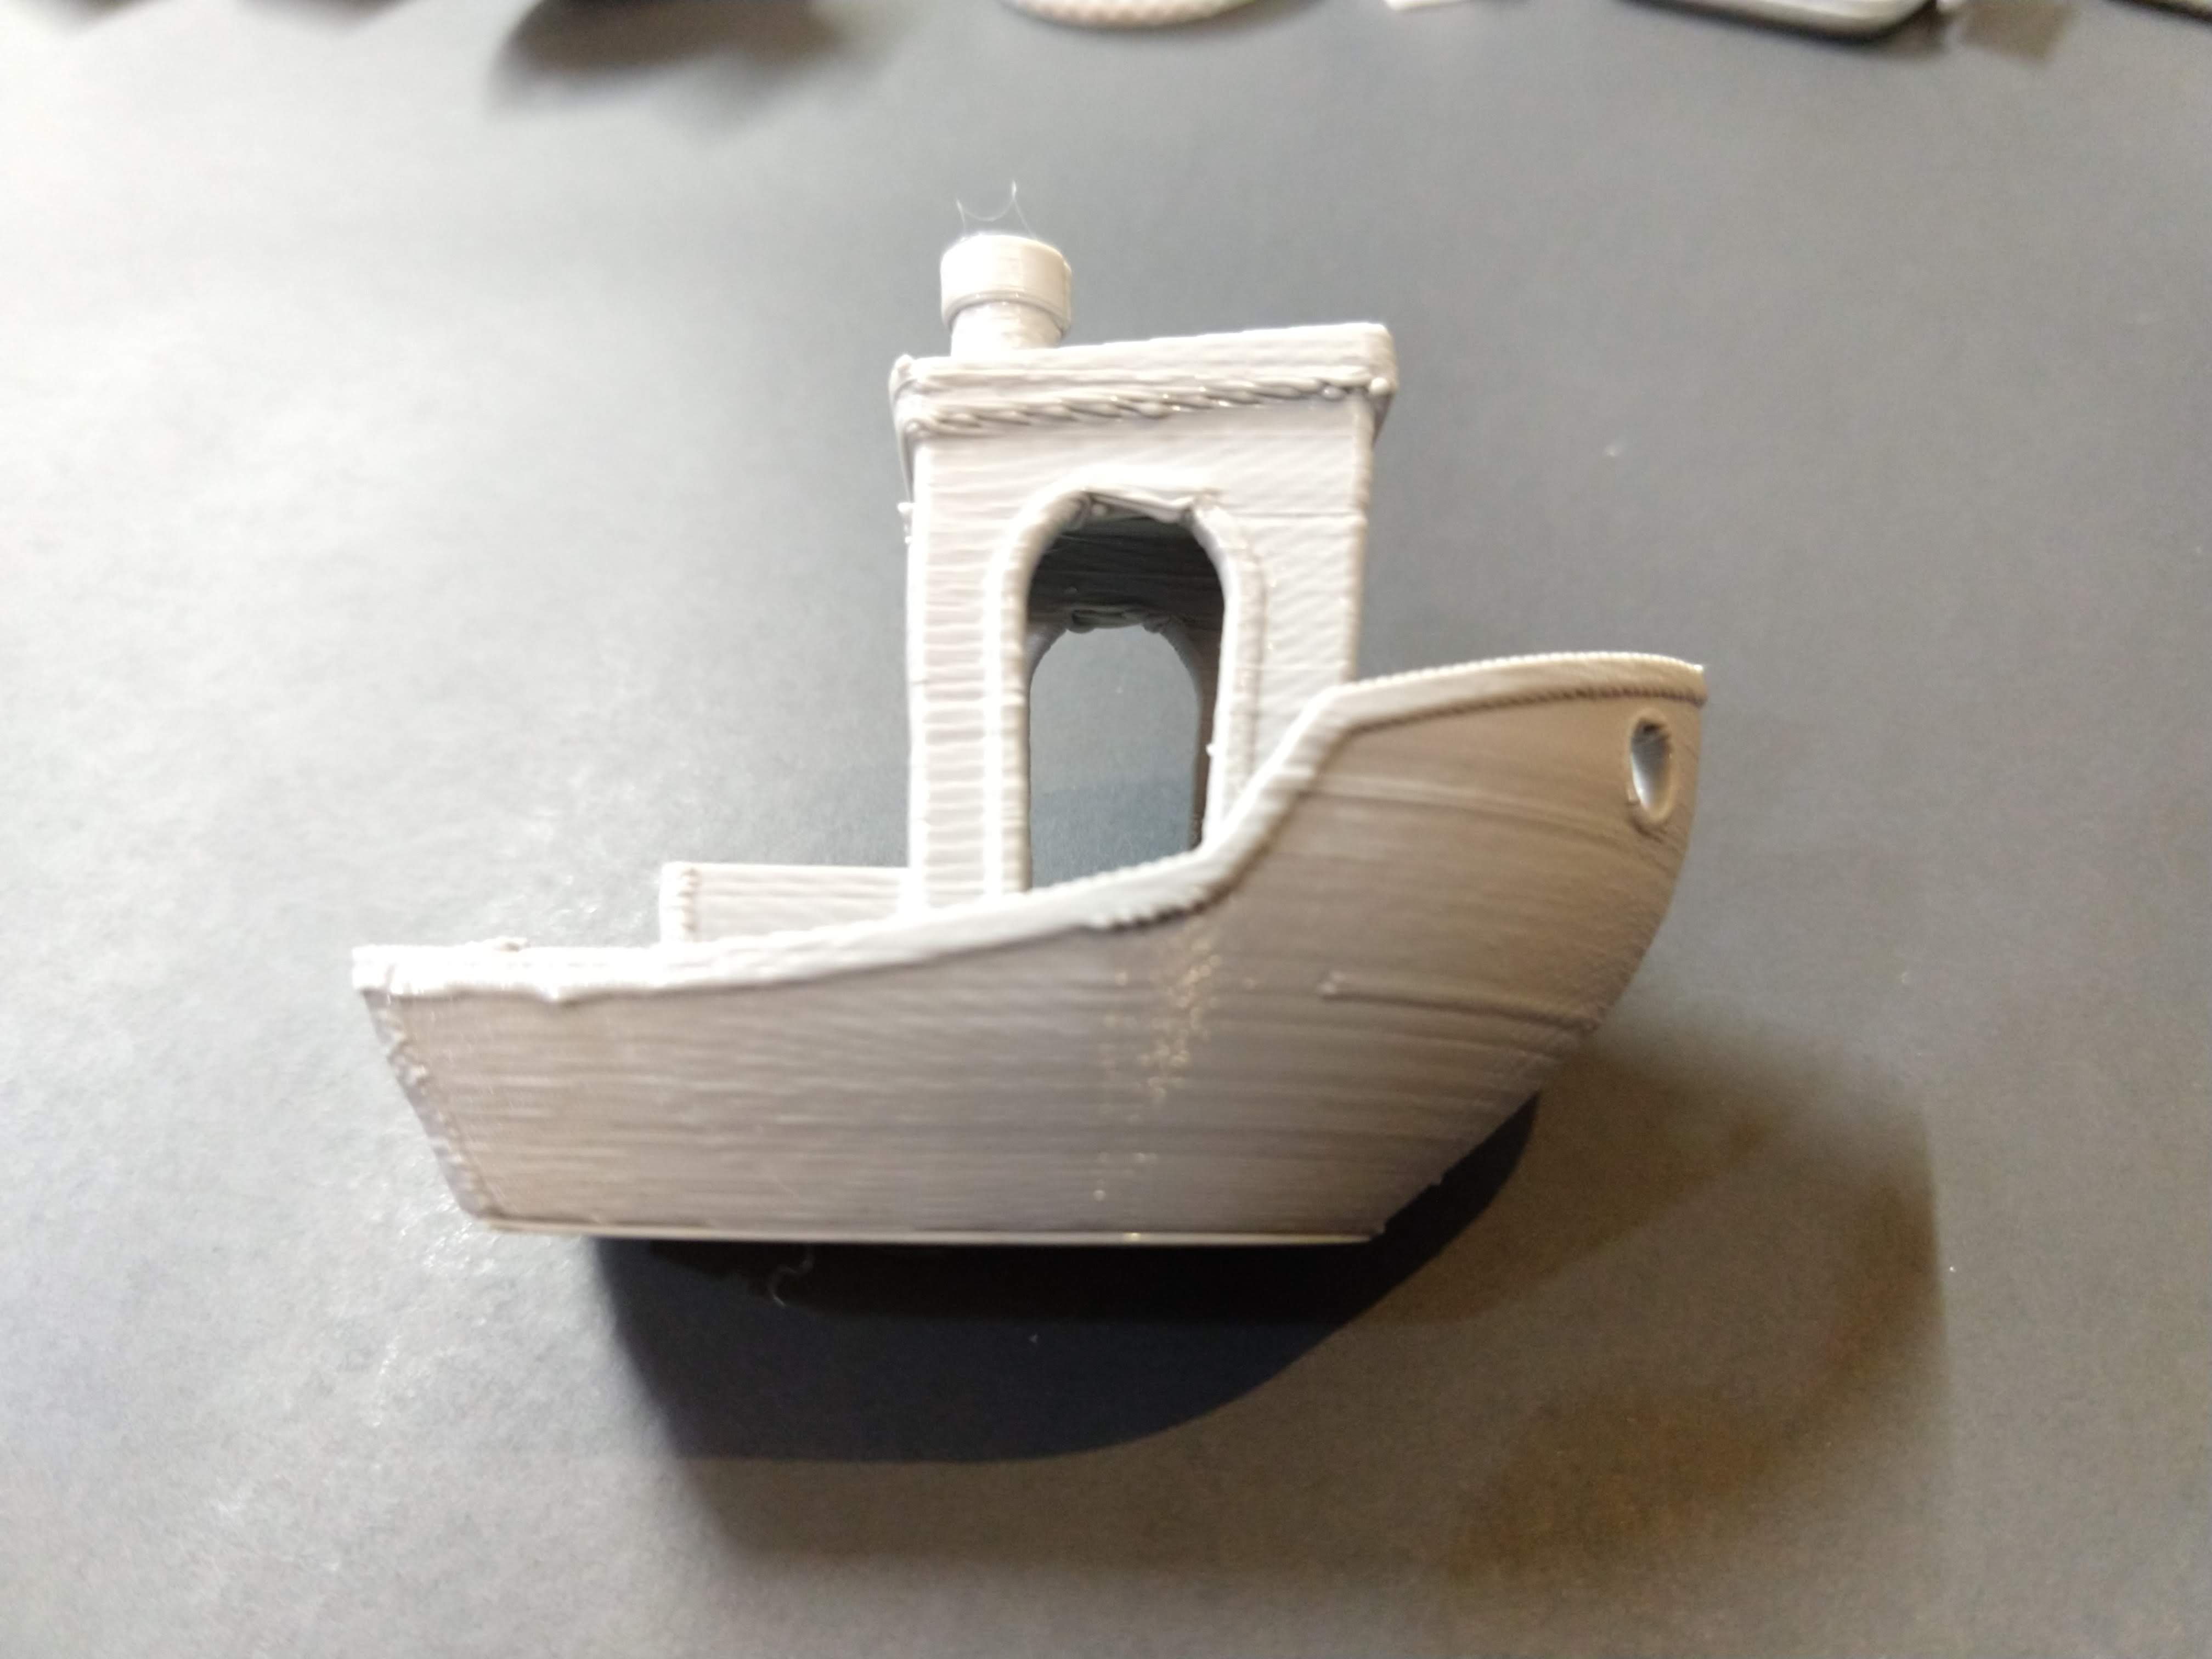
I switched to a filament with a more photo-friendly color, so as to see flaws in the print, and thus better solicit help from the internet. Again, the 3DBenchy turned out passable…
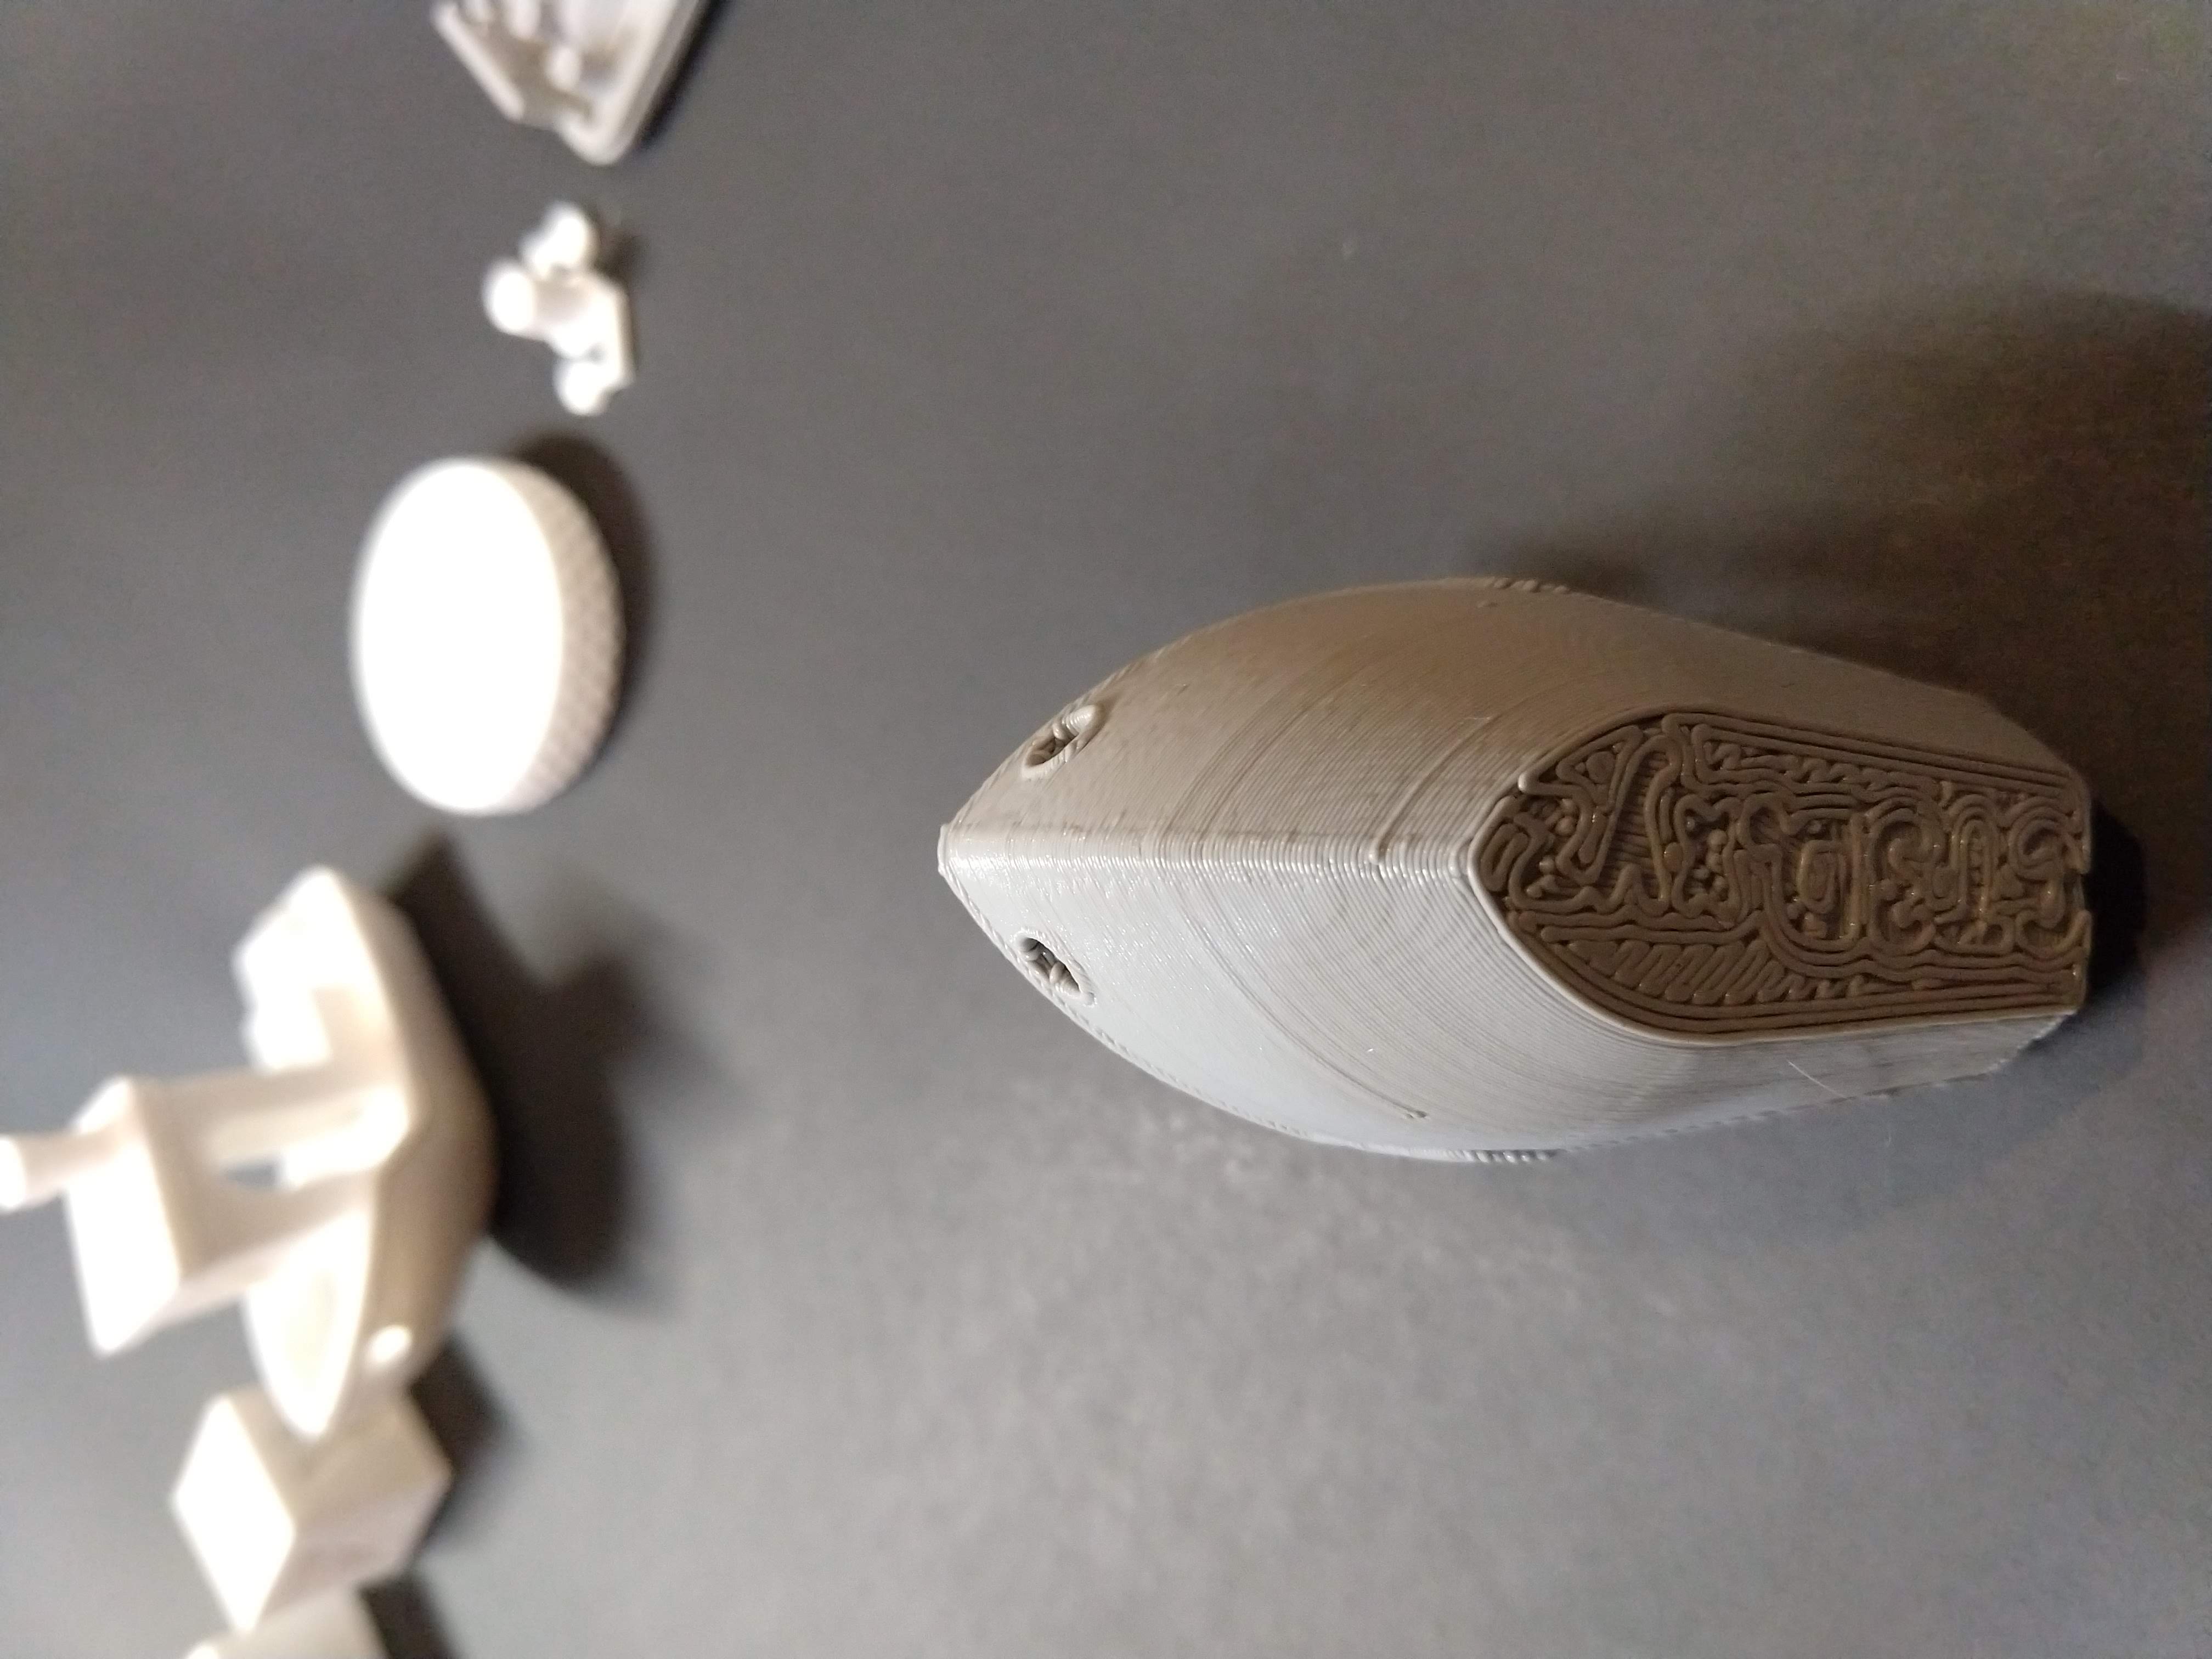
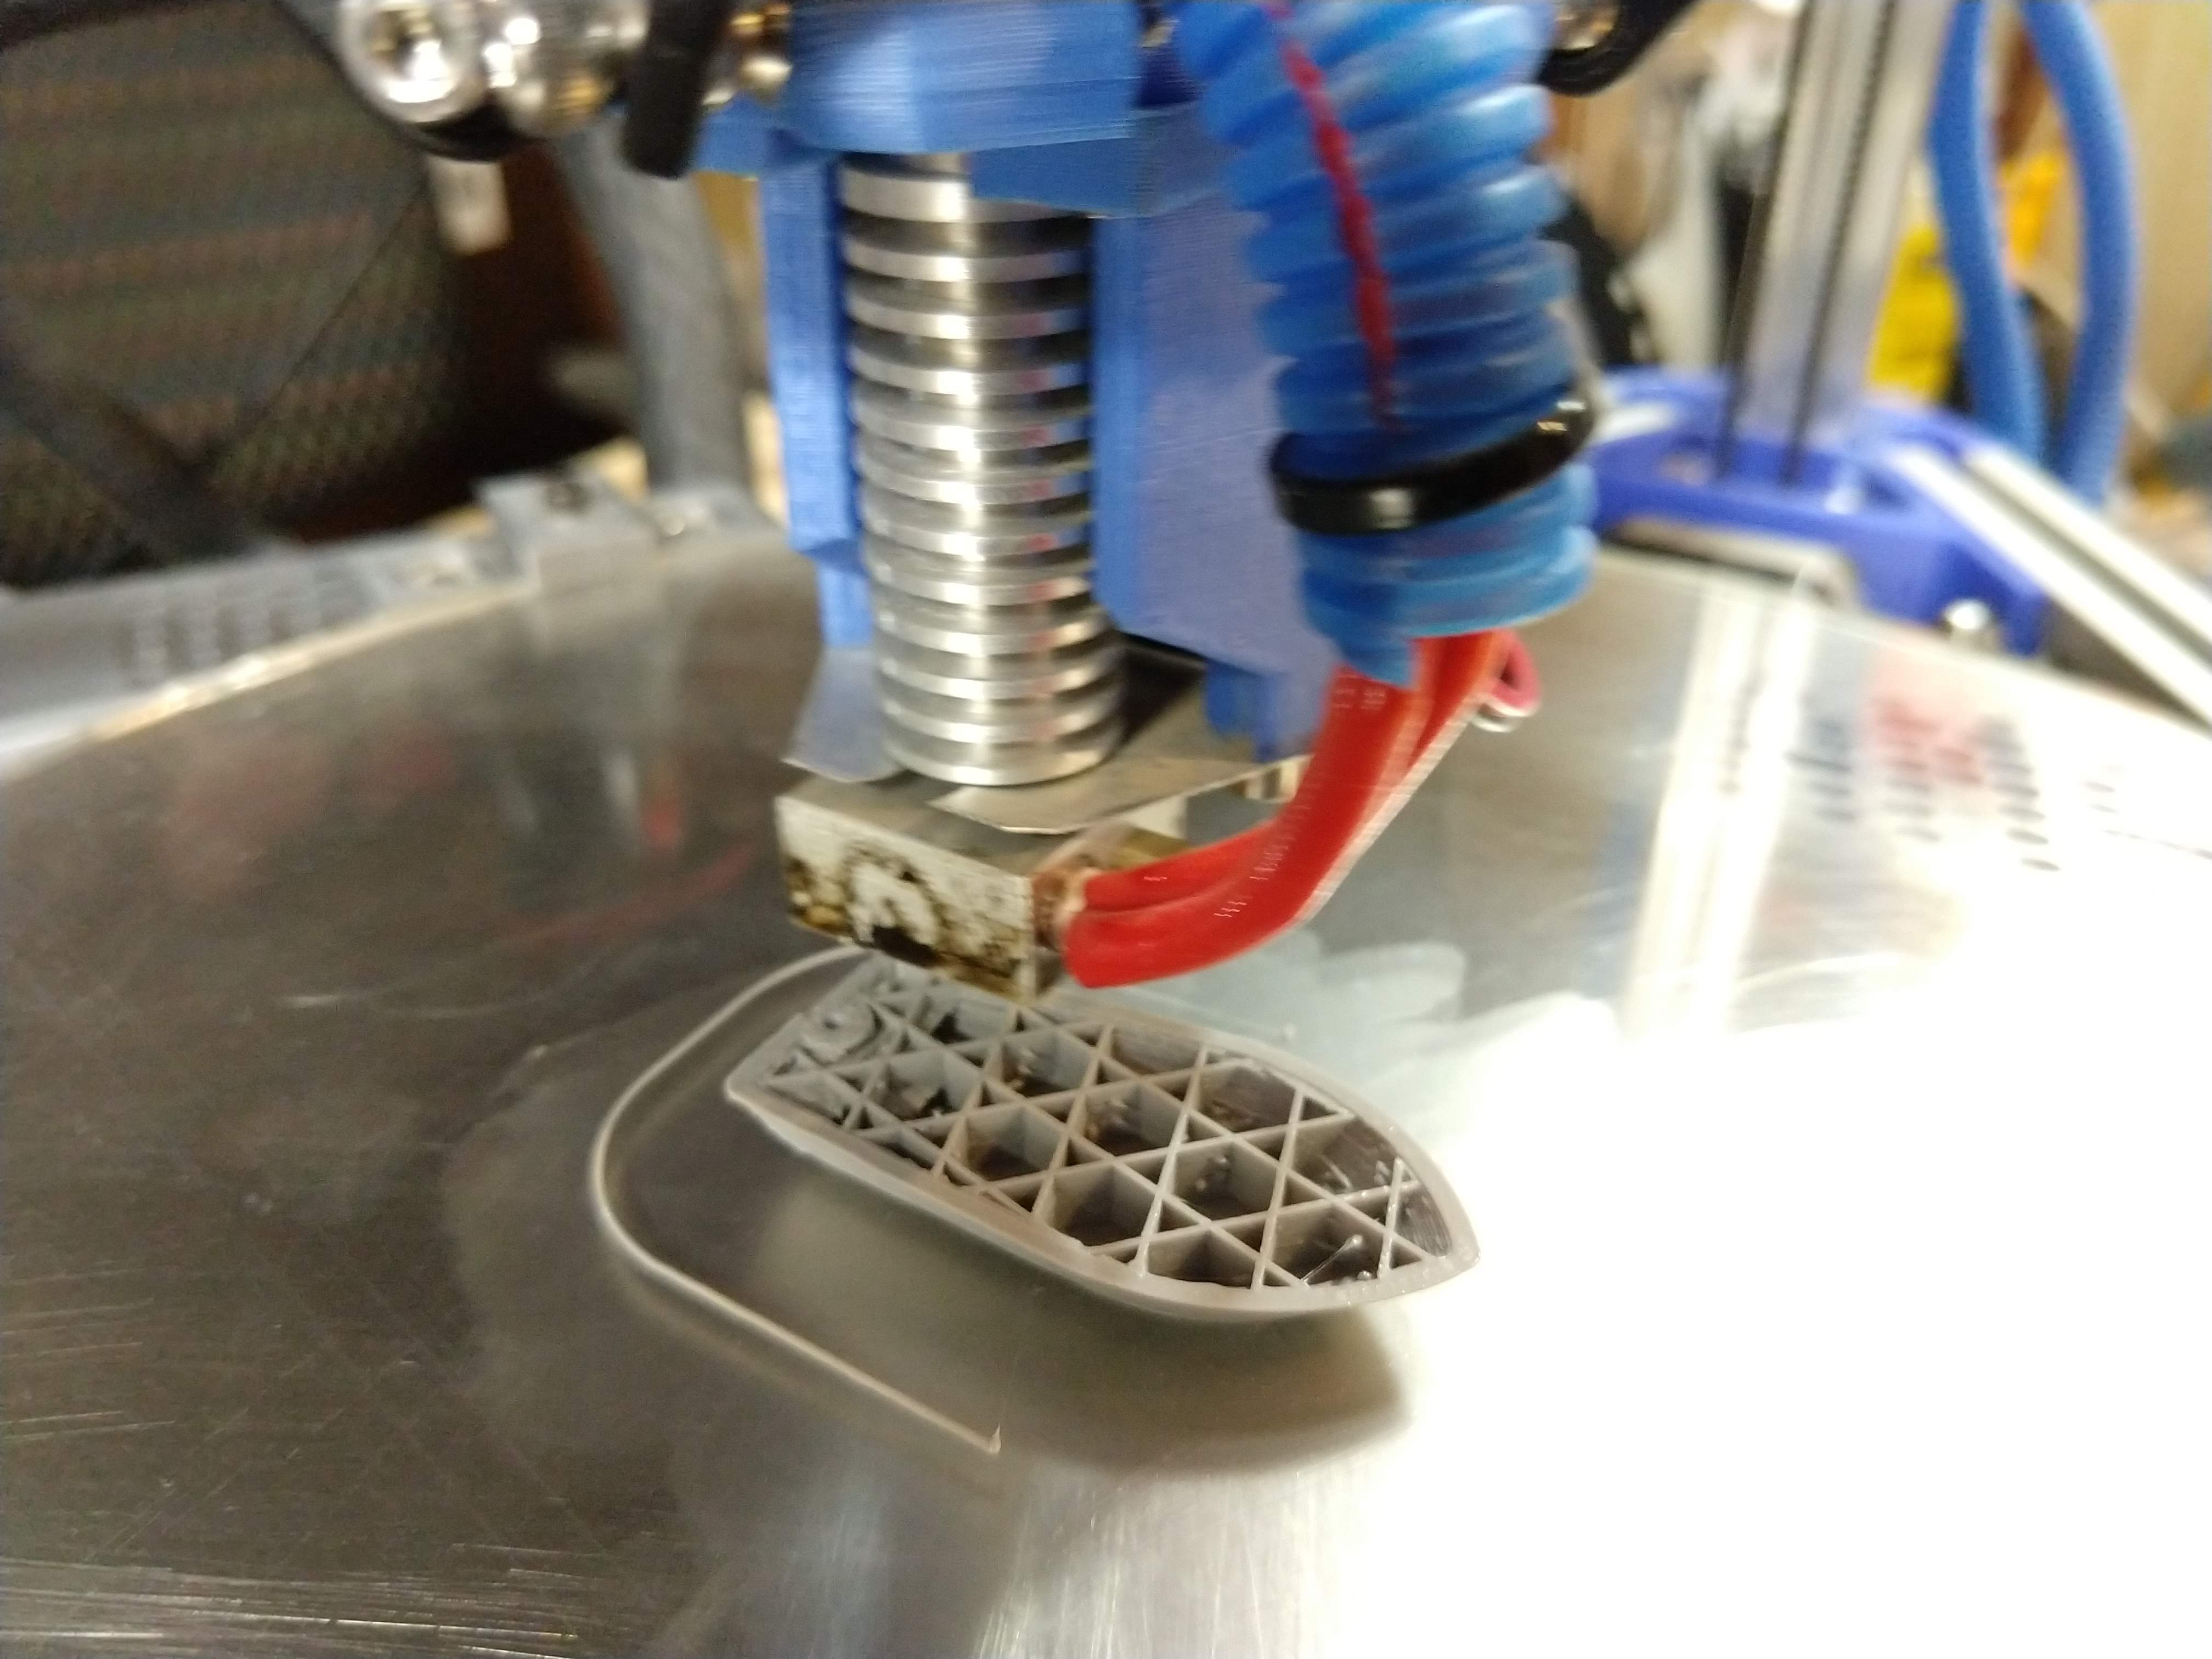
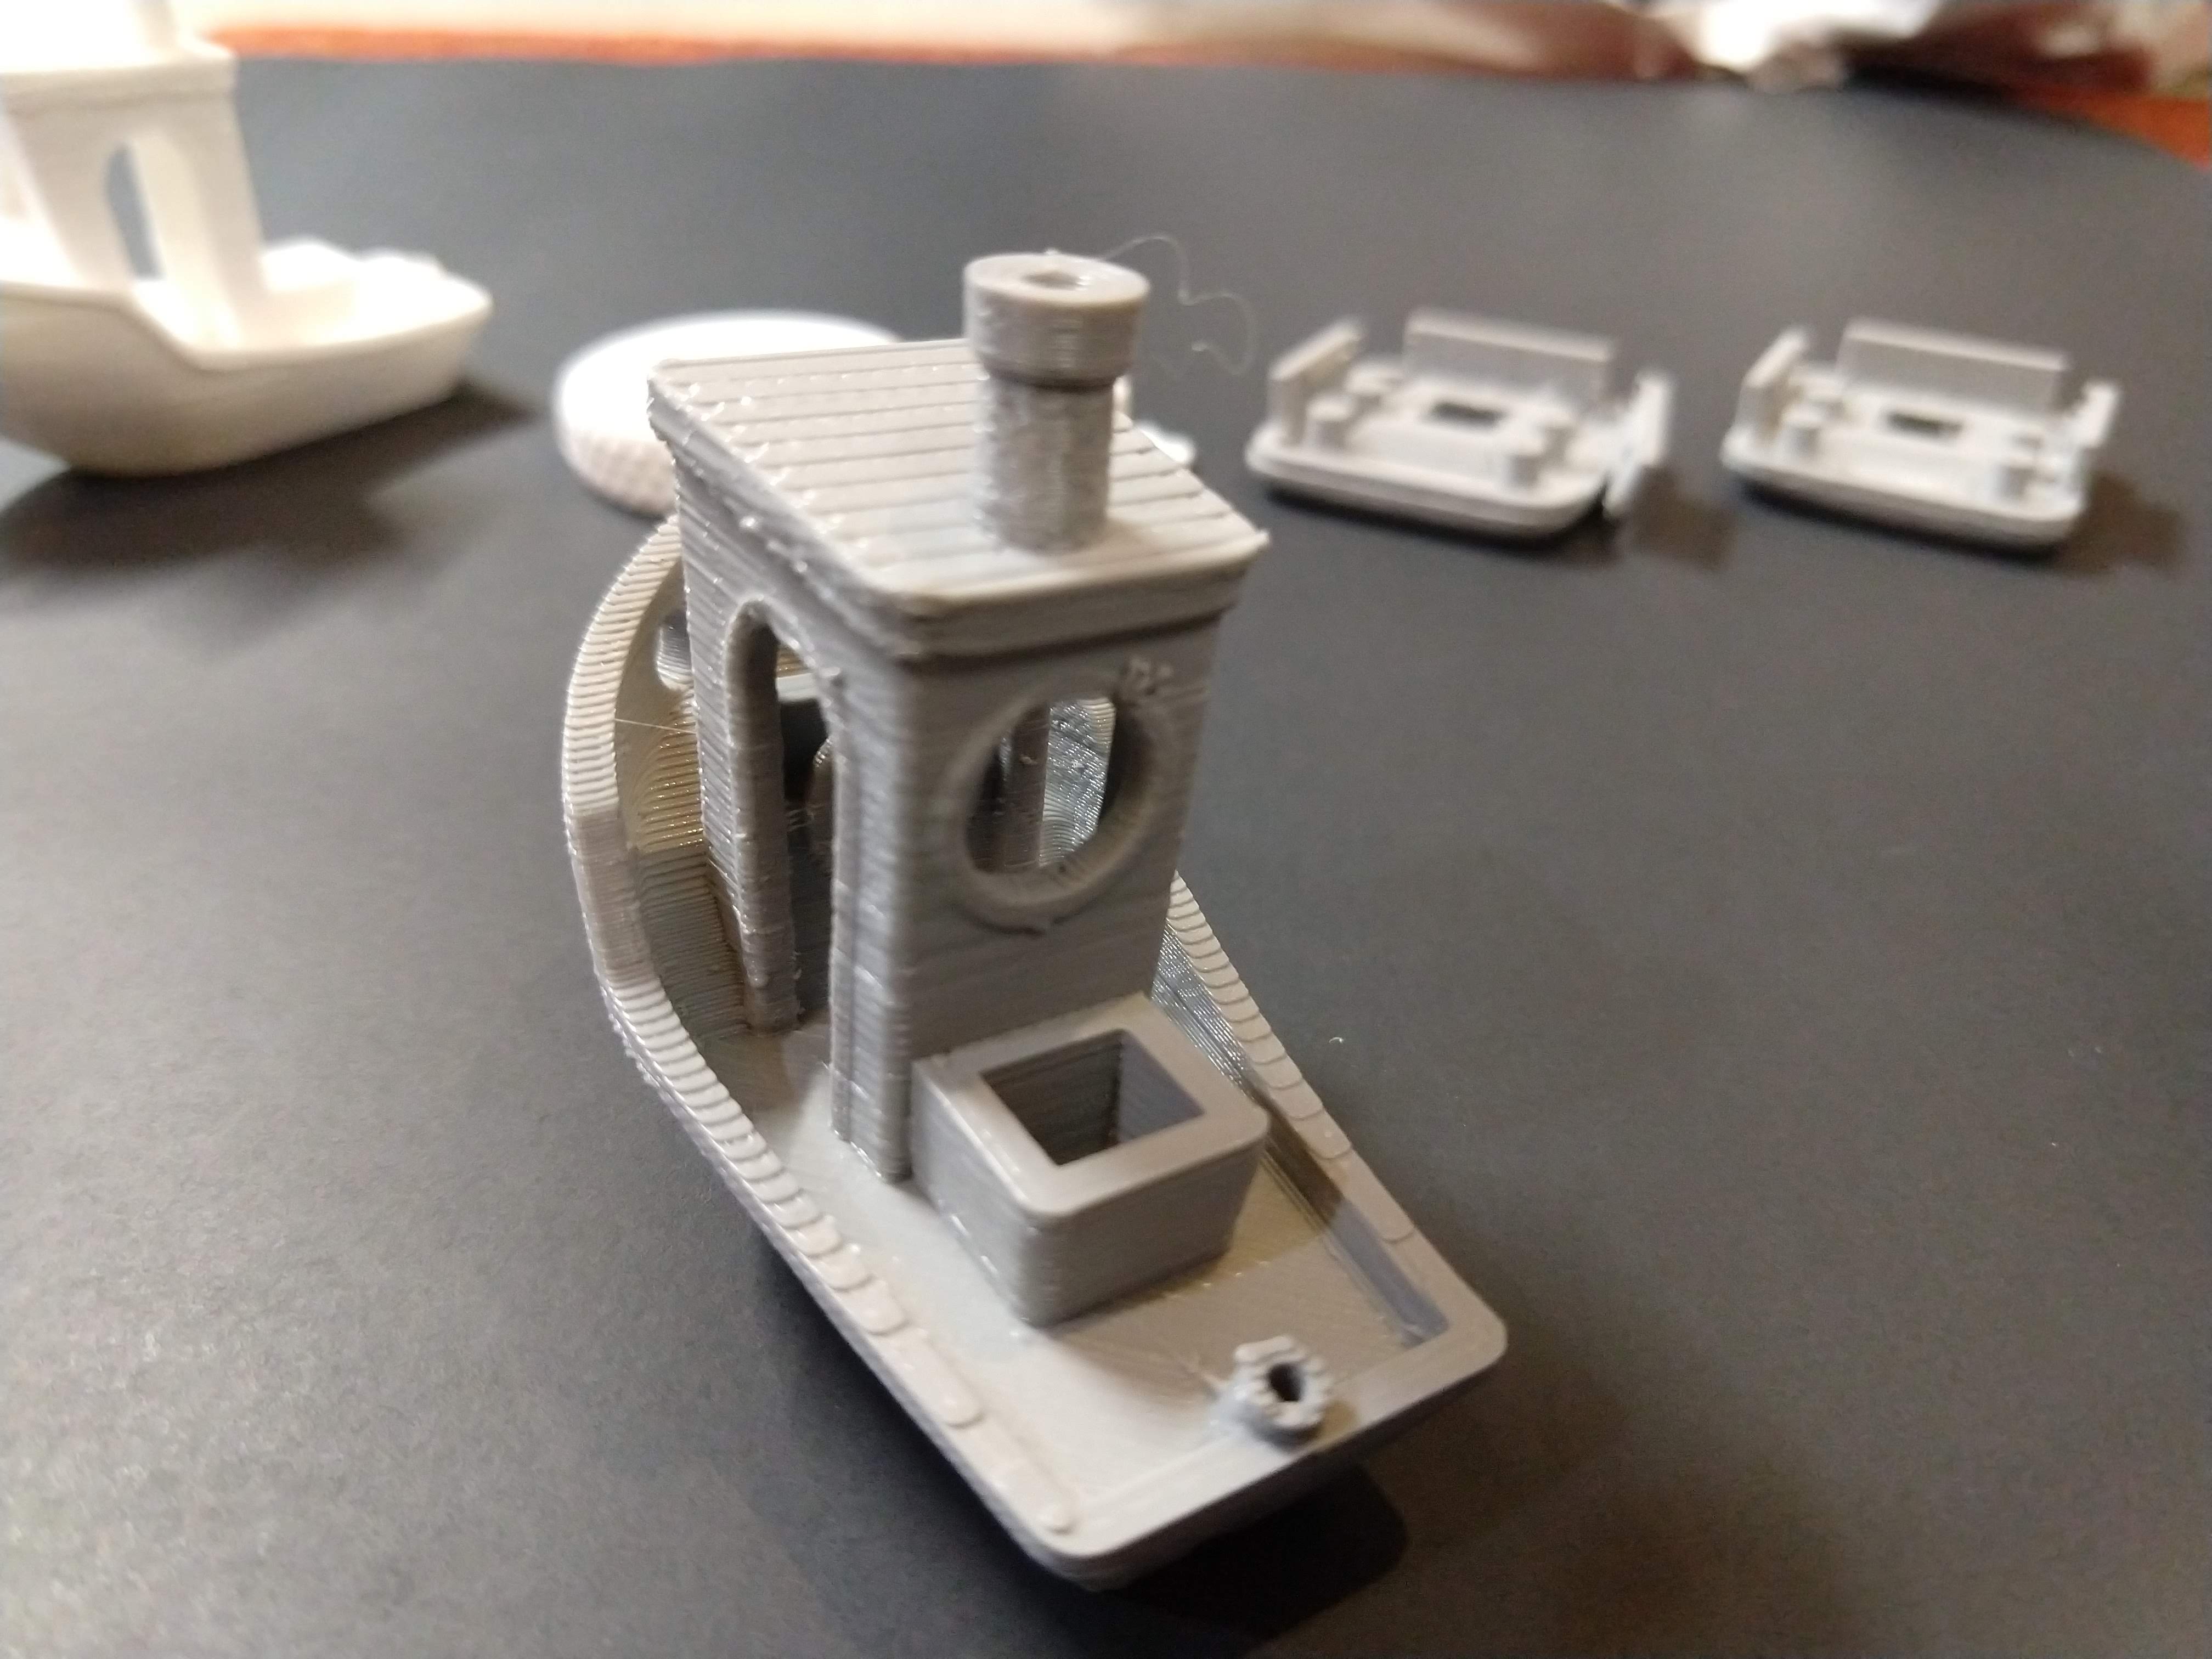
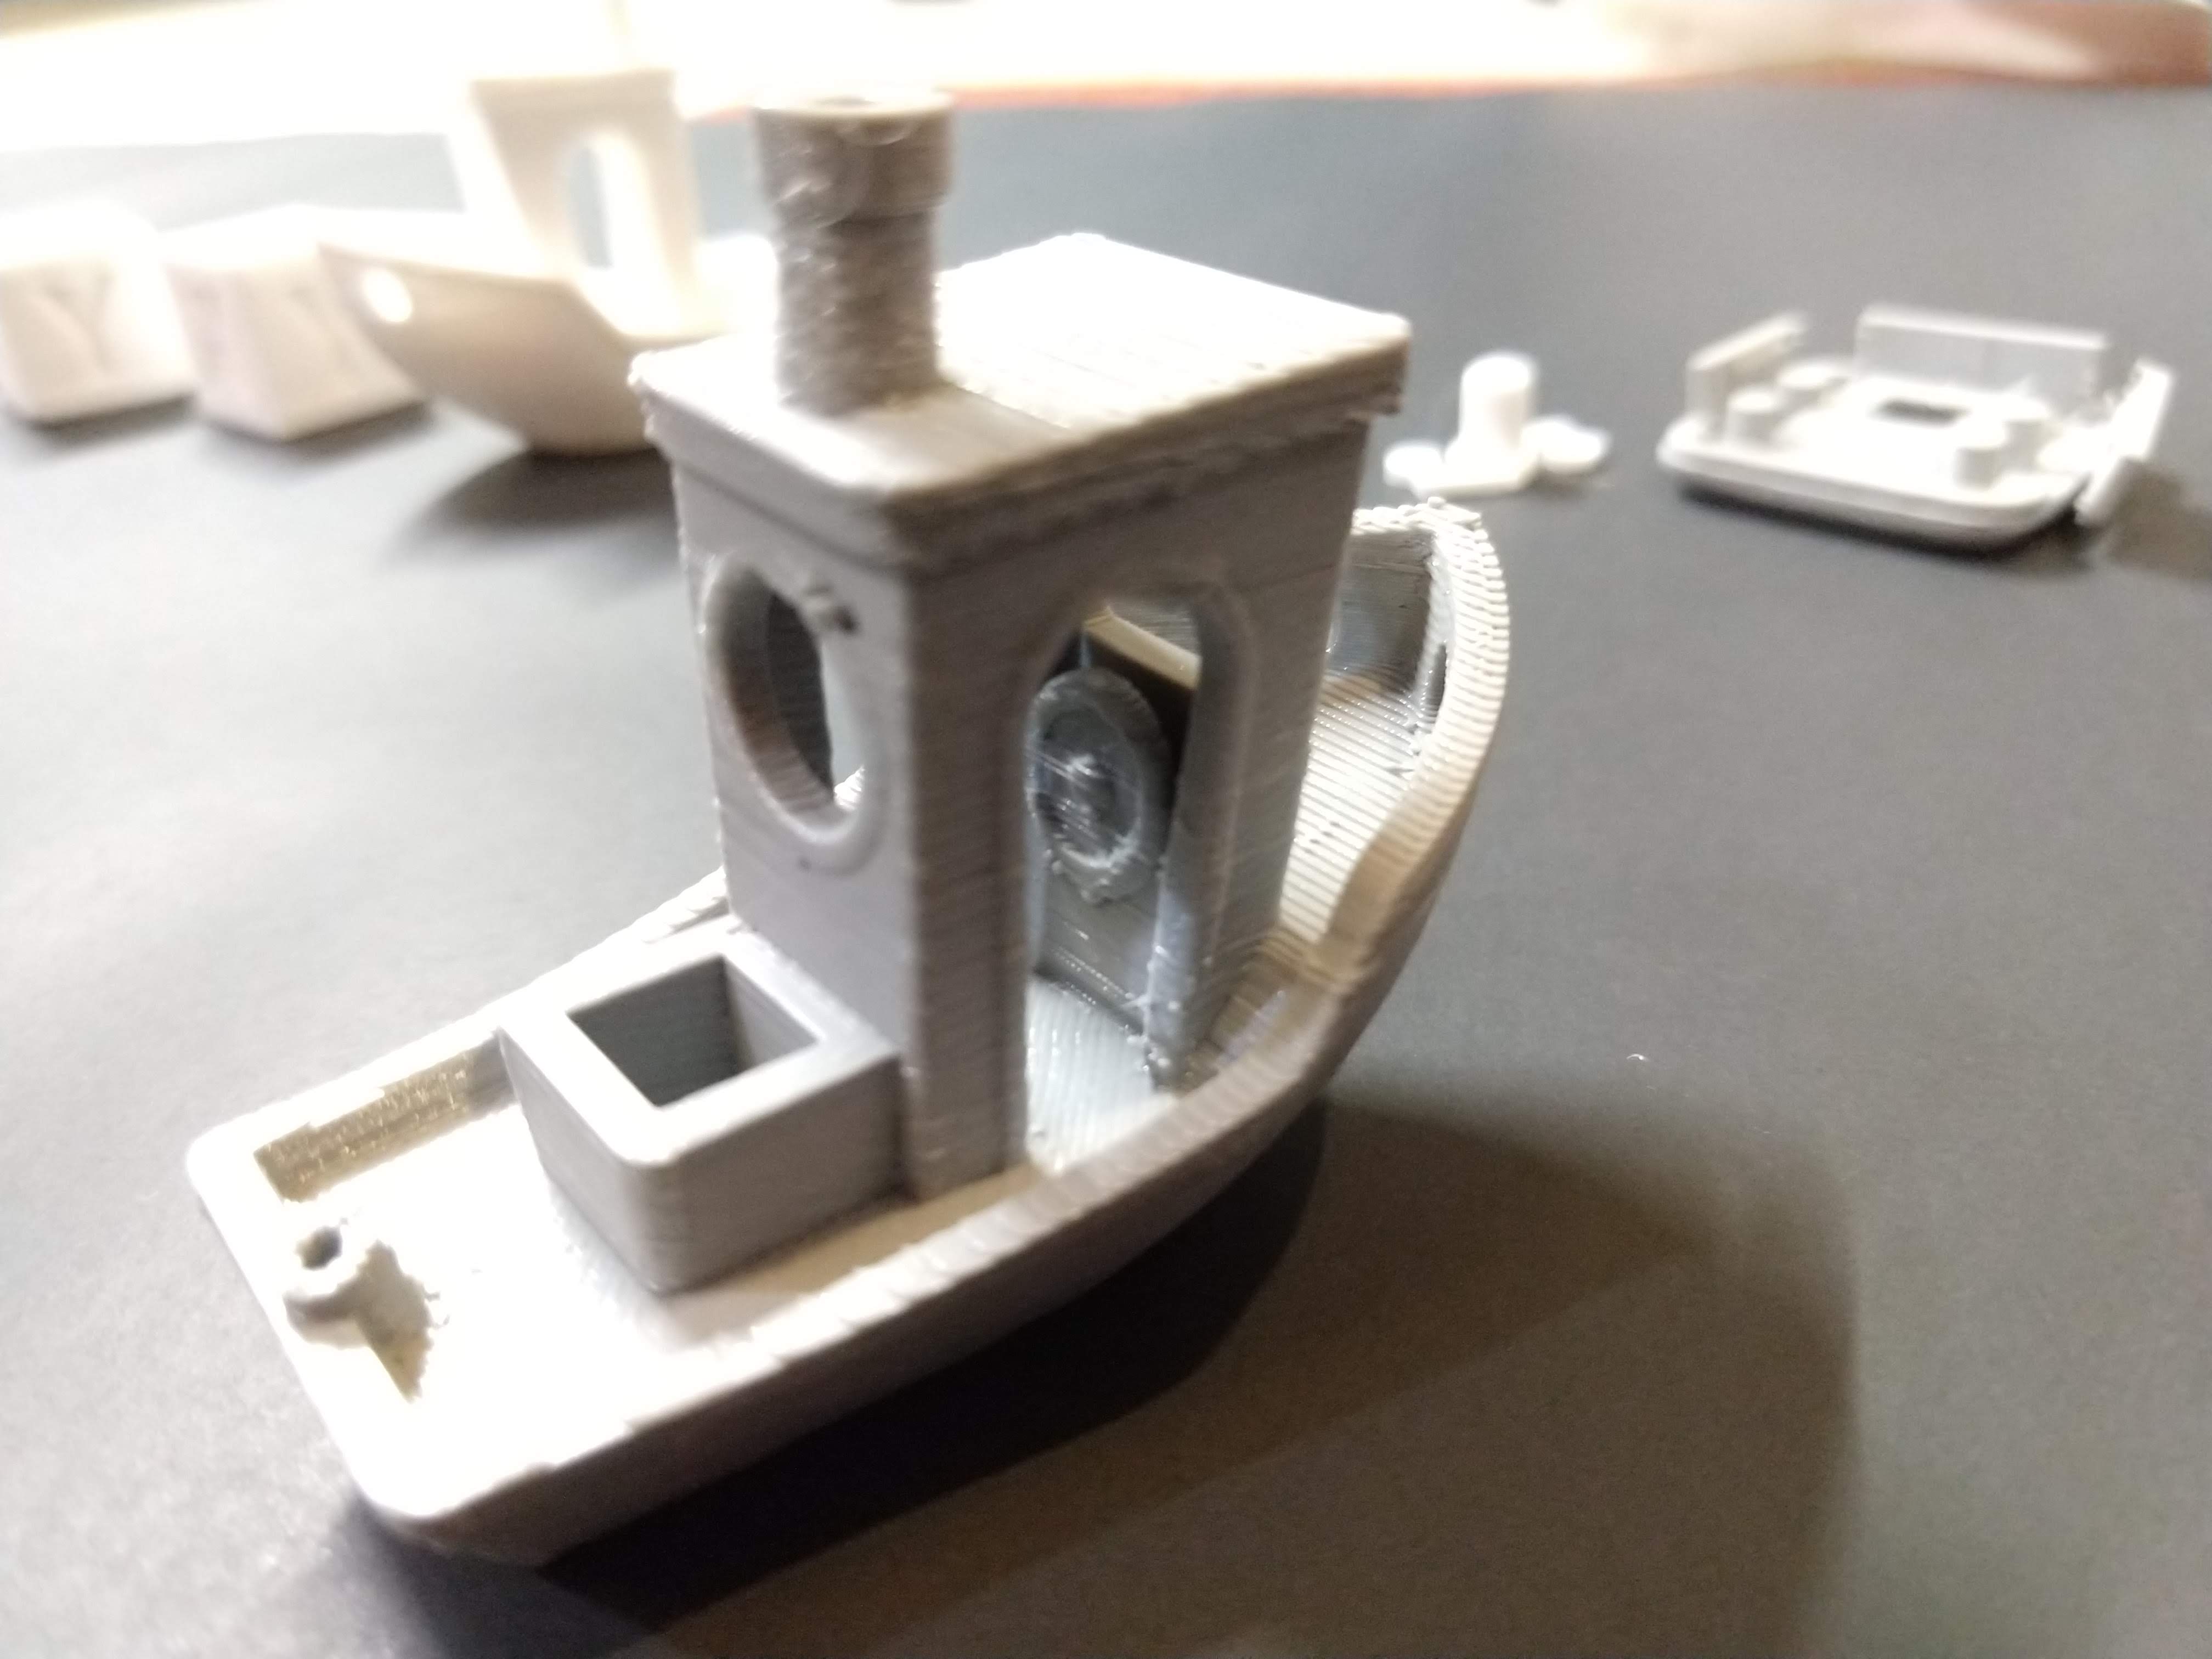
Emboldened by this print, I figured I’d carry on. But then the aforementioned controller case turned out like this…

I lost track of all the things I tried. Suffice to say my printer wasn’t respecting the boundaries and settings I established. Either that or I misunderstood what it could handle.
At this point, it was clear I needed help to get better results. Either that or I just needed to step away from it for an evening. Or both.
But at least the machine was generally operational, albeit in need of more work. Not too shabby, all things considered.
The lessons
Specific to delta printers
- I can see why many sources and guides I find recommend you get a delta printer as your 2nd or 3rd. If I had started from scratch, this would have been much more frustrating.
- There is a “safe zone” below the maximum travel each tower allows. This means that after all the carriages reach the top, you should either manually or programmatically lower on the Z axis far enough such that horizontal movement won’t cause a carriage’s required upward movement to ram into the top endstops. This will result in the belt slipping or completely coming loose. Ask me how I know!
- NOTE: A lot of guides I found assumed this didn’t mention this, even though their steps assumed you were starting from scratch.
General 3D printing
- Read the directions.
- A lot of 3D models have suggested print settings. Try these first before attempting modifications.
- For models that don’t have a lot of directions or detail, expect to do some experimentation to find successful settings.
- Temperature is key.
- Temperature affects how well your first layer adheres to the bed, and subsequent layers. As such is the foundation for the rest of the print.
- A working heated bed would mean better adhesion, and probably less fiddling with other variables outside recommended settings to get similar results. A heated bed is common, and sometimes it’s assumed you have one.
- Your environment affects temperature. This seems obvious, but notable since printing in your garage or your basement can yield wildly different results.
- Again, this is where a heated bed would help me, since my area of the basement gets pretty chilly.
- Even the reputable Prusa recommends using an enclosure for your printer if you can. I will save that for another day.
- Precision is critical.
- I was fortunate that I already had a set of calipers and precision metric rulers in a variety of sizes. I used them to measure calibration, key component sizes, and accuracy of prints.
- Did I already mention the importance of the first layer? If it lays down unevenly, you’ll probably get curled edges or the thing will just pop right off the bed in the middle of your print.
Personal takeaways
Not that anything above was void of opinion, but the following are specifically personal statements.
3D printing in general
Despite the few times I verbally threatened to scrap the whole thing, I enjoy the activity. I even enjoy the assembly, repair, and debugging. I gravitate towards work that blends programmatic challenges with physical results, and the unique implications therein.
While I would enjoy the tinkering as a hobby, I’d prefer to also have a 3D printer with stronger community support, and a more common configuration. Perhaps something more “out of the box” like a Prusa or “good by default, great with mods” option like an Ender 3 Pro.
I appreciate what I learned while trying to tune this thing without a heated bed, and with manual calibration and bed leveling. But I’m so ready to buy whatever sensors or tools are required to perform these tasks automatically. My future 3D printers will either need to already have these, or support them as a trivial upgrade.
If you end up using Marlin, as I did with the RAMPS board, using PlatformIO or the Auto Build Marlin VSCode plugin is a much better experience than Arduino Studio. It even compiles and uploads way more quickly.
Delta 3D printers
Would I build a delta from scratch? Probably not any time soon. Even a kit would need to be pretty solid, and with sufficient positive response from the community.
That said, deltas are supposed to be great for fast and high-quality prints, once you have them tuned well. Again, compared to cartesian printers, that may hinge more on your resilience and ingenuity than reliance on the community’s support.
However, delta printers are elegant in their construction, and mesmerizing in action. It’s possible that I may always want one, even if just for those reasons.
3D printers as a tool
Many use 3D printers purely for their novelty. I certainly don’t blame them. As someone that appreciates constructive hobbies, this would certainly do the trick.
What has me really excited is the potential for small batch, custom fabrication. Even if a part ultimately needs to be machined from metal, having the option to prototype the shape and movement via FDM makes a lot of sense.
I’m looking forward to using 3D printing to supplement other hobbies (RC planes), new hobbies (robotics and small electronics), and general household upkeep. Occasionally something handy shows up on r/functionalprint.
Here’s what helped
Without just dumping my build/revival log verbatim from Google Docs, here are some tricks and references I used the most.
YouTube calibration guide for Kossel XL
- This printer is pretty similar to mine, as best I can tell. He still references the deprecated
DELTA_SMOOTH_ROD_OFFSET, as most guides seem to do. I couldn’t find an equivalent in recent versions of Marlin. - The video has great explanations, and a very helpful outline with timestamps in the description.
- Watching at 1.5x speed wasn’t too quick. It got me through the content quickly, with enough time to pause and adapt his instructions to my different tools or situation.
- Something he covered that many skip is getting the extruder calibration right. M92, some blue tape, and a set of digital calipers made this much easier.
Kossel XL and Mini build manual playlist
- For some reason, perhaps since the kits are long since discontinued, this playlist is unlisted.
- I needed to referred to this a few times, mostly to make repairs, or decide if an upgrade was worth disassembly.
Marlin Firmware documentation and tools
However good or thorough docs can be, it’s rarely enough to just link to them.
- Searching the docs page for
deltalet me skim what options may be unique to my printer type, or what might be cartesian-only. - M503 to report the settings already on the printer. As stated before, this gave me a slight head start based on the previous owner’s configuration, or otherwise let me double-check my understanding.
- Again, I wish I’d known about Auto Build Marlin sooner, rather than waiting forever for Arduino Studio to upload 1-line changes to
Configuration.h. - Forking Marlin on GitHub to help maintain my
Configuration.hand use Git to easily compare my changes to the defaults. Maybe there’s a better way, but this works for now.
Other various 3D printing tools
- OctoPi/OctoPrint: most helpful after a printer is operational. It’s a convenient way to load GCODE, start and monitor prints from anywhere on your network. You can even allow management over the internet, if you so choose.
- Slic3r: an Open Source slicing tool. This turns model (STL) files into GCODE required by the printer.
- Repetier Host: some people use it as a full suite, but I mostly used it to direct-connect to the printer and test or debug calibration settings.
- UGU Stic clear glue sticks. I put a thin layer on the freshly-cleaned glass bed before prints. If the print doesn’t remove too much, sometimes it’s good for 2 or 3 prints. It cleans off nicely with water.
- 2x microfiber rags, one for cleaning and one for drying.
- “Sewing machine” tweezers. These are great for precise placement and extraction, or grabbing oozing filament from the hot end before it ruins the first layer.
- Putty knife, paint scraper, phone repair kit. All these helped in various ways to pry stubborn prints off the glass print bed.
- Precision measuring tools, like digital calipers and metric metal rulers of varying sizes.
- Ball-end metric hex key set. Sometimes those hex bolts are at weird angles.
- Zip ties, a variety of M3-M6 screws and nuts, and “drop-in” nuts that fit in the slots or grooves without requiring removal of the extruded aluminum rails.
- A build log. Use a notebook or Google Docs or something. Chances are you won’t remember all the things you tried yesterday that didn’t work. Save your future self some time and write a few notes at the end of a debugging session.
- USB extension cable and a folding table.
Troubleshooting 3D prints
These do a decent job calling out the most common starting issues with 3D prints. If they don’t fix your problem, it helps to have tried them when you go asking the internet for help, since they’ll probably get suggested!
- Print Quality Troubleshooting Guide from Simplify3D.
- Troubleshooting Guide to Common 3D Printing Problems from All3DP.
- 3D Printer Troubleshooting Guide from MatterHackers.
There are many others out there. Eventually the content starts to repeat itself, but it’s usually worth a skim for new hints. I’ve even found helpful videos on YouTube from searching troubleshooting 3D prints or debugging 3D prints.
After you’ve tried a few things, r/FixMyPrint on Reddit seems to be worth a shot. I haven’t used it yet, but the notion of doing so frequently compelled me to further research.
Remembering how computers work
I can’t tell you how many times I forgot that Octoprint was connected to the printer’s control board while trying to connect from Repetier or upload some firmware, or vice versa. You can’t have more than one connection on a serial port at once. It will tell you the upload failed and you’ll freak out because you didn’t change anything that crazy. I re-learned this at least twice a night.
What’s next
- Attempt an install of a FSR bed leveling solution, using this guide. This was provided by the previous owner. If that is too much of a pain, maybe I’ll get a BLTouch.
- Attempt upgrade from RAMPS 1.4 8-bit controller (with broken heated bed control) to the provided 32-bit Azteeg x5 mini v2.
- These boards support Smoothieware, which is an alternative solution to Marlin, and is supposedly better suited to delta 3D printers.
- Get a different printer, full stop.
- I’d at least like one consistent, modern, and more broadly-supported solution in my shop.
All in all, wrestling with this thing has been a blast. If nothing else it gave me a great excuse to clean up my workspace and build another workbench!